- Messages
- 356
- Reaction score
- 0
- Points
- 26
Knowing SSD
Credits to: Wikipedia, Google, Digital Trends, Microsoft, Build Computers.
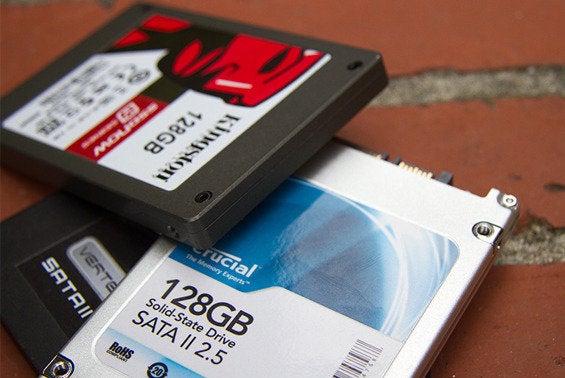
SSD stands for Solid State Drive or electronic disk, though it contains no actual "disk" of any kind or motors to "drive" the disks) is a data storage device using integrated circuit assemblies as memory to store data persistently.
SSDs have no moving mechanical components. Compared with electromechanical disks, SSDs are typically more resistant to physical shock, run silently, have lower access time, and less latency. However, while the price of SSDs has continued to decline in 2012, SSDs are still about 7 to 8 times more expensive per unit of storage than HDDs.
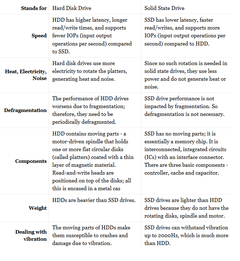
HDD VS. SSD
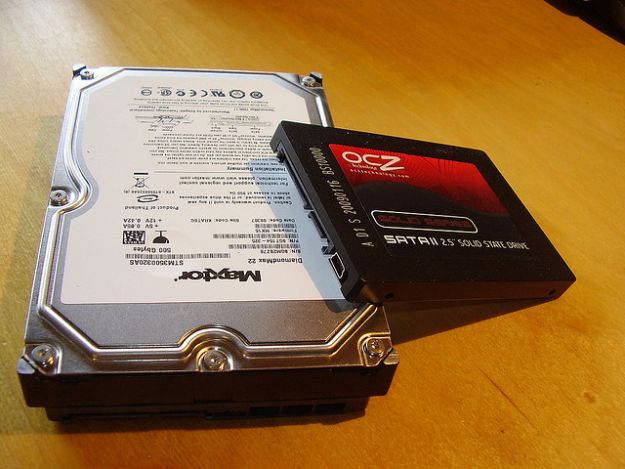
Pro and Cons

Price: HDD (Cheaper) SSD (Expensive)
Capacity: HDD (Huge) SSD (Minimal)
Capacity: HDD (Huge) SSD (Minimal)
Paano nasisira ang SSD?
Wear and Tear. Write and Erase
An SSD is flash storage. It has no moving parts. So unlike on a traditional mechanical hard drive, nothing breaks. SSD wear and tear has to do with write cycles.
No moving parts in NAND flash drives.
Flash storage handles data in a specific way. When data is written to a block, the entire block must be erased before it can be written to again. The lifespan of an SSD is measured in these program-erase (P/E) cycles.
Maximizing Your Storage
Since Limited lang ang capacity ng SSD and most of us gusto lang ng Fast Boot ng ating OS. Hindi naman natin kelangan i-Store ang personal documents/files natin sa ating SSD. Files such as music, movies, games, p**n stuffs, etc. And to maximize the life of our SSD iwasan nating mag write/delete dito sa drive na to. So the following can be done.
Here are some tips kung pano natin mamaximize ang ating data.
For Desktop Users Only - Sorry sa mga Laptop/Netbook/Tablet Users this is not applicable sa device nyo.
Dedicate your SSD for your Operating System only.
Add a spare drive with Higher Capacity Drives this time we will be using HDD. Recommended 320GB to 1 Terabyte depende kung paano nyo ginagamit ang PC nyo. Higher capacity drives for heavy downloaders ng movies and HD Games. Sa HDD nyo na po isasave ang inyong mga Downloads/Files/ etc.
NOTE: Don't Forget to Create a Restore Point in Case of Trouble. And pls do it at your own risk.
1. Change the Directory for your Documents/Downloads/My Pictures etc.
1. Change the Directory for your Documents/Downloads/My Pictures etc.
You can change the location of the folders in your personal folder (such as My Documents and My Pictures) by redirecting them. For example, if you have a large number of files in your My Documents folder, you might want to store the files on a different hard drive or on a network to free up space on your primary hard drive.
When you redirect a folder to a new location, you change where the folder, as well as the files in the folder, are stored. However, you'll still be able to access the folder the same way you did before you redirected it.
Tip
- Instead of redirecting a folder, you might want to consider including a folder in one of your libraries. For example, if you have a large number of pictures, you can store those pictures in a location other than your primary hard drive, then include that location in your Pictures library.

The Location tab in the Properties dialog of a folder
To redirect a folder to a new location
- Click the Start button , and then click your user name.

- Right-click the folder that you want to redirect, and then click Properties.
- Click the Location tab, and then click Move.
- Browse to the location where you want to redirect this folder. You can select another location on this computer, another drive attached to this computer, or another computer on the network. To find a network location, type two backslashes (\\) into the address bar followed by the name of the location where you want to redirect the folder (for example, \\mylaptop), and then press Enter.
- Click the folder where you want to store the files, click Select Folder, and then click OK.
- In the dialog that appears, click Yes to move all the files to the new location.
To restore a folder to its original location
- Click the Start button , and then click your user name.
- Right-click the folder that you previously redirected and want to restore to its original location, and then click Properties.
- Click the Location tab, click Restore Default, and then click OK.
- Click Yes to recreate the original folder, and then click Yes again to move all the files back to the original folder.
2. Change Default Installation Directory In Windows
1. Press (Windows Key + R) , and type “regedit” and press “OK”.

2. A window like below will open.

3. Navigate to HKEY_LOCAL_MACHINE > SOFTWARE > Microsoft > Windows > CurrentVersion and click on CurrentVersion. Now here we need to edit separate entries for 32 Bit Windows and 64 Bit Windows. So see for your version.
For 64bit Windows
Double Click on “ProgramW6432Dir” and change the installation directory.

For 32bit Windows:
Double Click on “ProgramFilesDir” and change the installation directory.

Now whenever you will install a new software it will automatically take the new location. In the above example we have changed the installation folder only, but we recommend you to change the drive too, so that you can have sufficient free space on your Windows drive.
3. Change Temp Files/ TMP Files Location
Bring up Explorer, right-click on "My Computer", and select properties.
Go to "Advanced", then "Environment Variables". This pops up the box you need to make the changes in.
There are 4 places you need to change;
User variables (2) - change both TEMP and TMP to your chosen one (I have it set to Z:\TEMP\ for both)
System variables (2) - scroll down and change both TEMP and TMP to your chosen one.
If you've set a separate partition to hold them (as I have), it's also worth setting your Virtual Memory to point at this partition as well.
Although I would warn you, don't put them on a separate drive, then remove the drive from your system. Windows complains..
VIDEO:
4. Enable Trim Support
What is TRIM Support and Why is It So Important?
Before you can appreciate what TRIM does, you'll first have to know this: Left unchecked, the performance of a SSD will deteriorate with use. This is due to the awkward way that solid state drives overwrite data to areas that already contain information.
Example: I copy a file to my brand new SSD. Since the file is being copied to a fresh blank space, the SSD is able to write the data directly at full speed. When I delete this file later, it is not instantly removed from the SSD - Instead the operating system simply marks the space taken up by the file as "not in use".
When the operating system requires more space, it will simply overwrite this "not in use" zone. A traditional hard disk drive is able to overwrite data in one single operation, but a solid state drive first has to erase all data in this "not in use" space before it is able to record the new data.
This awful situation is compounded by the fact that solid state drives are only able to delete data in large 512 kB blocks so this slows down the entire overwriting process even more.
Here's how SSD TRIM saves the day: When you delete a file from your SSD, the operating system will still mark the file space as "not in use"... but in addition, a TRIM command is sent to wipe that marked space clean. That way, your SSD is able to write data to that marked space as if it was brand new and skip the cumbersome deletion process.
That's why TRIM is so crucial: It makes sure that your SSD performance doesn't degrade with use, and keeps it (nearly) as fast as new.
In order for TRIM to work its magic, two conditions have to be met first:
- Your operating system has to support TRIM command (e.g. Windows 7 and Windows 8)
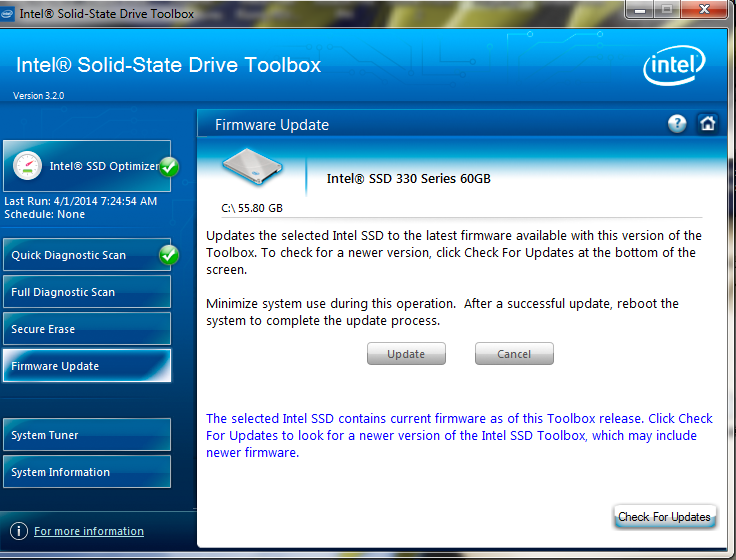
- Your solid state drive's firmware has to support TRIM as well
How to Enable TRIM Support for Windows 7 and 8
First let's check if the TRIM command is already active in Windows:
1. Open a Command Prompt window (run as administrator)
Click on Start button → Click All Programs → Accessories → Command Prompt
2. Type the following at command prompt and press enter:
fsutil behavior query DisableDeleteNotify
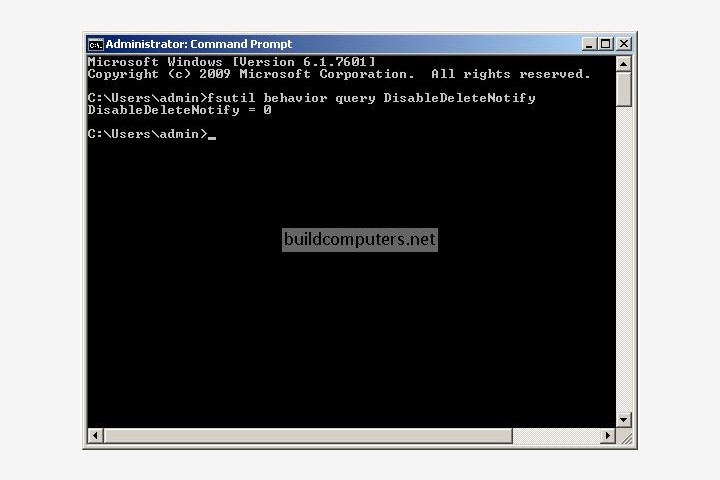
There are two possible outcomes:
- DisableDeleteNotify = 0 : TRIM is already enabled and working in Windows
- DisableDeleteNotify = 1 : TRIM is not enabled → Proceed to step 3 to enable it
fsutil behavior set DisableDeleteNotify 0
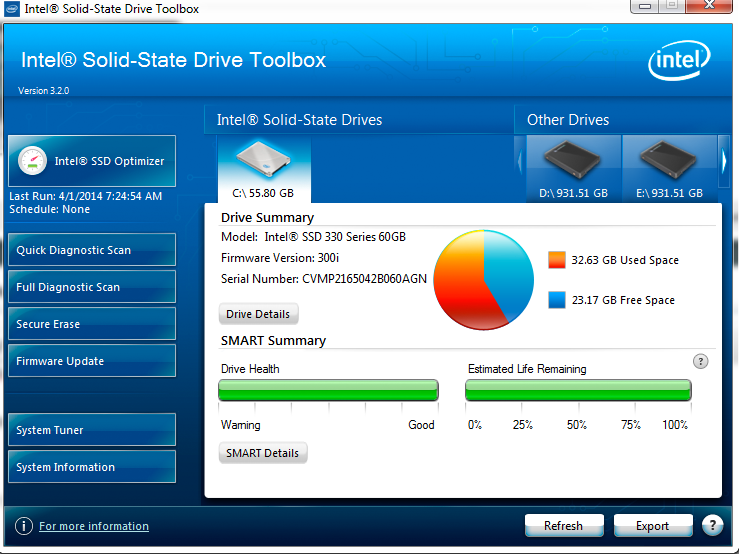
You can check your SSD Life status by using applications such as SSD Life,
Crystal Disk Info, Hard Disk Sentinel and others.

I hope my bago kayong natutunan. Feedback na lang po kayo.
Thanks for Reading")
Thanks for Reading


