- Messages
- 131
- Reaction score
- 148
- Points
- 108
Step 1: Download the Installation Media
1. In a web browser, visit the Ubuntu download page and pick the Ubuntu version suitable for your machine. The most popular versions include:2. Once you find the version you need, click the green Download button. You’ll be taken to a thank-you page, and your download should start. (We will download and install Ubuntu 20.04 for desktops.)
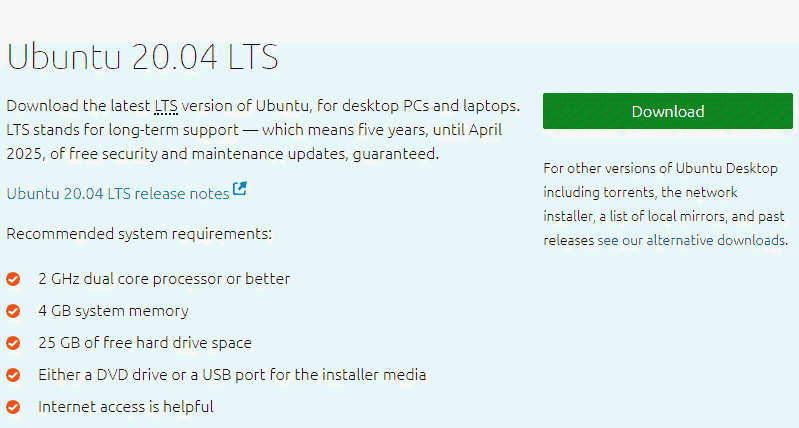
The download is an .iso file. You can use it to create a bootable USB drive.
3. Save the file to a location of your choice.
Note: If you’re installing to a virtual machine (like VirtualBox), you can mount the .iso image directly.
Step 2: Create Bootable USB
You will need a USB drive with 4GB or more. This process will delete all data on the USB drive. Make sure to backup any existing data on the USB drive.Option 1: Create a Bootable USB Drive on Ubuntu
Use the Create startup disk tool:- Open a search dialog, and type create startup.
- If it’s not installed, the Software Center will offer the option to install it – choose the option for USB drive, then open the utility.
- In the top pane, click Other, then browse and select the Ubuntu 20.04 .iso file you downloaded.
- In the bottom pane, select your USB drive.
- Click Make startup disk.
Option 2: Create Bootable USB Drive on Windows
You’ll need to install a third-party utility called Rufus to create a USB bootable drive.1. Download the Rufus utility. Scroll down to the download section and click the link to download the latest version of Rufus.
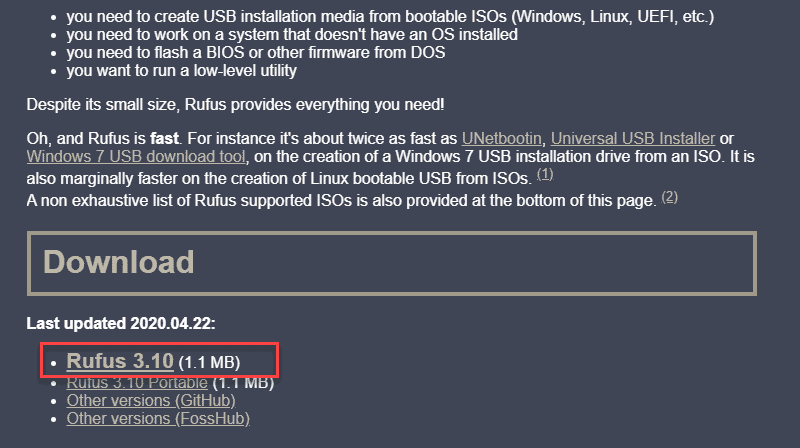
2. Run the file once downloaded.
3. A pop-up dialog opens. You will be prompted whether you want to check for online updates. Select No.

4. The Rufus utility launches. Plug in the USB drive – you should see the drive pop up in the device field.
- Set the USB as the device you wish to write to.
- In the Boot Selection drop-down, click Disk or ISO Image.
- Click the Select button to the right.
- Browse and select the .iso Ubuntu file you downloaded earlier.
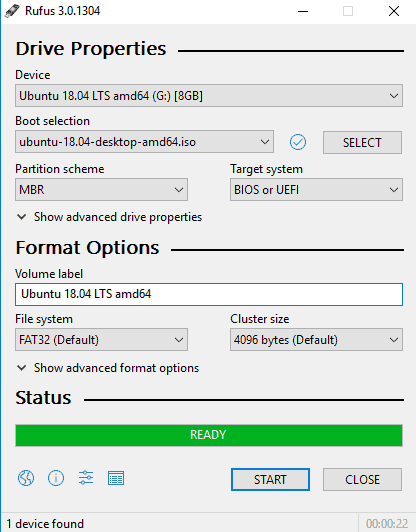
5. Click Start.
Step 3: Boot up Ubuntu from USB
1. Turn off your system. Make sure you remove all other USB devices, such as printers, memory cards, etc.2. Insert the Ubuntu USB drive into the system and turn on your machine.
There are two possible scenarios:
- The computer boots the USB drive automatically.
- You need to manually configure USB booting in the Boot Menu or BIOS/UEFI.
The boot menu key may be different depending on your computer manufacturer. Below is a list of common boot keys associated to a brand:
| Asus | F8 or Esc |
| Acer | F12, F9 or Esc |
| Compaq | F9 or Esc |
| Dell | F12 |
| eMachines | F12 |
| Fujitsu | F12 |
| HP | F9 or Esc |
| Lenovo | F8, F10 or F12 |
| Samsung | F2, F12 or Esc |
| Toshiba | F12 |
Your system should start loading the Ubuntu live disc menu.
Note: If you are experiencing issues when booting the USB from the boot menu, try to boot the USB from BIOS/UEFI.
Step 4: Run Ubuntu
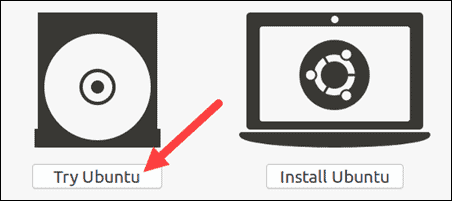
You can test Ubuntu 20.04 before you commit to installing it. The .iso includes a live mode that only runs in memory.Launch this mode by clicking Try Ubuntu.
Step 5: Install Ubuntu 20.04 LTS Desktop
To begin the installation, click Install Ubuntu.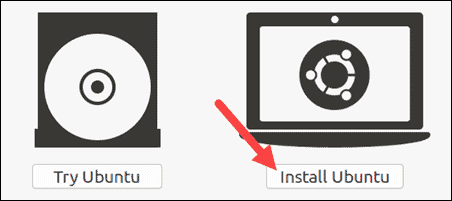
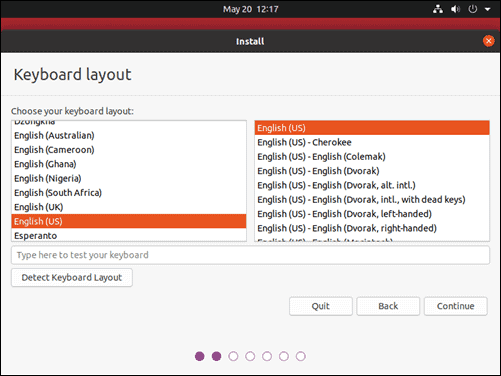
Choose Keyboard Layout
By default, the system will select English and English.If you have a non-standard keyboard, you can select it in the list. Alternately, click Detect Keyboard Layout and the system will automatically choose your keyboard. If you need to test your keyboard, use the labeled field.
When you’re ready, click Continue.
Choose Starting Applications
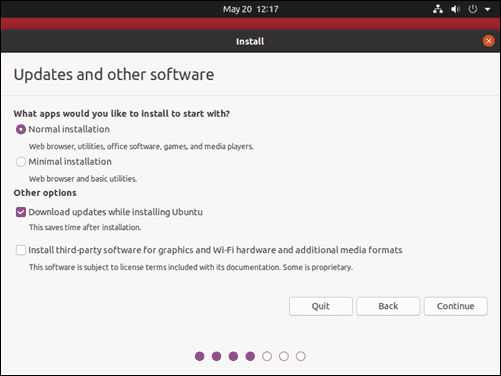
- Normal Installation – This is the full Ubuntu Desktop experience, with office software, games, and media players.
- Minimal Installation – Choose this to save disk space, especially if you won’t be using media players or productivity software.
- Download updates while installing Ubuntu – This does the work of downloading large package files during the installation. Once the installation finishes, the packages will be ready to apply as updates.
- Install third-party software for graphics and Wi-Fi hardware and additional media formats – Some hardware, like graphics cards and wi-fi cards, do not have open-source driver support. Also, some media formats, such as .wmv, do not fall under the GPL license. If you need support for these, you’ll need to agree to additional terms of use.
Disk Partitioning
Next, you’ll be presented with an Installation Type dialog. You can wipe the hard drive clean prior to installing Ubuntu by clicking Erase disk and install Ubuntu. If you go this route, skip ahead to the next step.Advanced users may want to edit Advanced Features. Use this to specify your own disk partitions or set other advanced options:
- Use LVM with the new Ubuntu installation: LVM stands for Logical Volume Management. This is a tool for dynamically managing different virtual drives on your system. It’s much like an enhanced version of the gparted tool.
- Encrypt the new Ubuntu installation for security: This will encrypt the drive’s contents. You’ll choose a security key, which will be required to decrypt and use the drive.
- Experimental: Erase disk and use ZFS: ZFS refers to Zettabyte File System, but it has grown into a hybrid file system and volume manager. Since it’s still being tested, avoid this setting on mission-critical production systems.
The next screen will allow you to create your own partition table and logical drives. This lets you divide a physical hard drive into different partitions. The operating system sees partitions as individual drives.
Note: Some users create their /home directory on a separate partition. If the operating system needs to be reinstalled, the partition with the /home directory is unaffected.
Click Continue to apply your changes to the drive partitions.
You’ll be asked to Write changes to disks? None of the options you’ve selected are permanent until you click Continue on this screen. Click Continue to proceed.
Select Time Zone
Once the system formats the disk partitions, the installer will ask Where are you?Type the nearest large city into the box, and the system will set your local time zone.
Click Continue.
Note: It’s always possible to change the timezone on Ubuntu at a later point in time.
Create User Account
Next, you’ll need to configure a user account. Fill in the following fields:- Name: Your actual name.
- Computer name: This is the hostname or network name.
- Username: The user account name you want to use.
- Password: Enter and confirm a strong password – the installer will automatically evaluate your password strength.
- Log in automatically: This is not recommended for publicly accessible servers.
- Require my password to log in: This is recommended for publicly accessible servers.
Once the installer finishes, remove the Ubuntu installation media. You’ll be prompted to Restart Now.
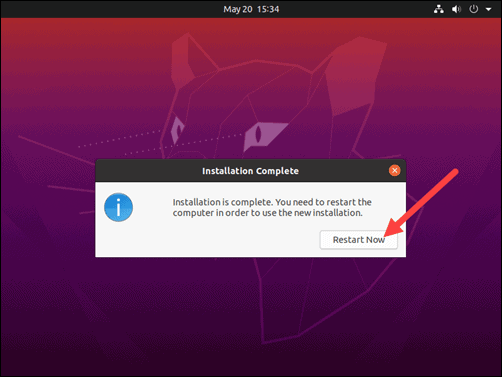
The system should boot into your fresh install of Ubuntu 20.04.


