Re: Samsung Galaxy J7 (SM-J700h) User
Yan din sabi ko non yung version ng j7 natin iba kasi twrp pang j7lte lang at ang j7 natin j7e3gxx. Timing lang to mga bayaw pag nag reboot na sya sa odin success na yun, pag lumabas na yung logo ng samsung dapat tanggal agad bateria pero bago mo iroot kailangan nakalagay nadin yung supersu mo sa internal or external. Basta madali lang bumilis ng sobra sobra j7 ko hehehe
- - - Updated - - -
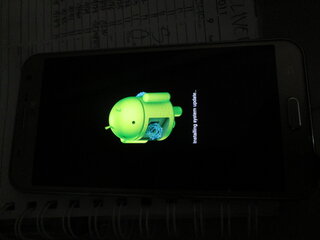
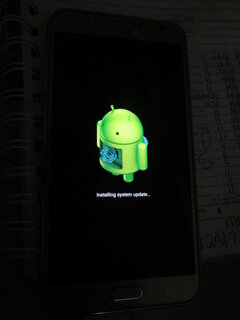
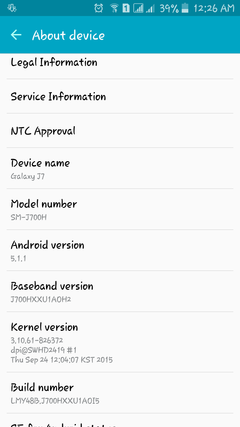
Mga bayaw eto samsung j7 (sm j700h ko)
View attachment 243938
View attachment 243939
Credit to xda developer
How to Root Samsung Galaxy J7 (SM-J700H) Exynos 3G Model & TWRP.
Please Follow step by step guides.....
***Things You Need:
Windows PC
USB Cable
80% Battery Charge available
***Please do a backup of your important files, cause if you do anything wrong or softbrick your mobile***
• 1st Download the rar file from Link (Delete Spaces) and extract the folder. Link: https: //mega. nz/#!VFgCGDpS!4fm1uvNRORAkrkQJ0KdaoiRCVS_sCaw3TVYJjHz inAU
• Then into the folder Install Samsung USB drivers in your PC.
• Now go to your mobile Settings>About Device>Build Number (Tap Continuously 7 times to enable Developer Options)
• Then connect your Mobile to your PC via USB cable and copy the "UPDATE-SuperSU-v2.46.zip" file to the internal storage of the phone. Don't extract this file.
• Enable USB Debugging on your device. (Settings > Developer Options > USB Debugging)
• You need to enable OEM bootloader unlock in your developer options to install the TWRP recovery! Go to > ‘Settings’ > ‘Developer Options’ > ‘Turn on OEM unlock’ on.
***Install TWRP Recovery:
1. Open Odin_v3.09 folder on your PC and double click "Odin3 v3.09.exe" file. This will open an Odin window.
2. Boot your Galaxy J7 into Download mode: Turn off your mobile. Press (Volume Down) + (Home) + (Power) button together and hold them until you see Samsung logo. Release them once you encounter a warning screen on your device. Press Volume Up to acknowledge the warning. This takes you to download mode.
3. Connect your Mobile device to the PC using an USB cable and make sure your device is detected. An “Added!! message will appear in Odin’s message box.
4. Now Set up Odin as follows:
Check the AP box add the "twrp-2.8.7.0-j7elte.tar" file. (Do not extract it)
Check Auto Reboot and F.Reset Time options.
See Odin Setup Image Here (Delete Spaces). Link: https: //mega. nz/#!tZ5wkaBa!Ul8cnigZIIOSdPYiIGJvtIzfdf58h_4hWFDbBh1 uLb4
5. Then click START button on Odin to begin the installation process.
6. After your device is rebooted you will see “PASS!” message in Odin and quickly remove your battery whenever you see Samsung logo on Startup.
***Rooting Your Device:
• Now put your mobile battery back and press (Volume Up) + (Home) + (Power) buttons together until you see Samsung logo. It will boot your mobile into TWRP recovery mode.
• Select Install Zip from TWRP.
• Now locate to Internal or External storage where you copied the "UPDATE-SuperSU-v2.46.zip" files before and select this file to Install. Slide to unlock, it will install the "UPDATE-SuperSU-v2.46.zip" into your mobile.
• Now reboot your Mobile.
After some minutes your phone will reboot. You will find your device rooted and SuperSU App installed.
You have successfully rooted Samsung Galaxy J7 with TWRP recovery installed.
To check your device rooted or not? You can test it by an app called "Root Checker". You can download this from Play Store.

") ok ang pag root ng phone kso may side effect yan cheers
ok ang pag root ng phone kso may side effect yan cheers