Symbianize Forum
Most of our features and services are available only to members, so we encourage you to login or register a new account. Registration is free, fast and simple. You only need to provide a valid email. Being a member you'll gain access to all member forums and features, post a message to ask question or provide answer, and share or find resources related to mobile phones, tablets, computers, game consoles, and multimedia.
All that and more, so what are you waiting for, click the register button and join us now! Ito ang website na ginawa ng pinoy para sa pinoy!
You are using an out of date browser. It may not display this or other websites correctly.
You should upgrade or use an alternative browser.
You should upgrade or use an alternative browser.
Beginners' Guide to Adobe Photoshop
- Thread starter pandasauure
- Start date
- Replies 915
- Views 119,483
More options
Who Replied?
 dito TS
- Messages
- 129
- Reaction score
- 0
- Points
- 26
Galing
- Messages
- 10
- Reaction score
- 0
- Points
- 16
wow.. thanks po dito.. gusto ko itry...")
- Messages
- 2,898
- Reaction score
- 1
- Points
- 28
- Thread Starter
- #646
salamt po sa pagbisita
- Messages
- 2,898
- Reaction score
- 1
- Points
- 28
- Thread Starter
- #648
maraming salamat po sa pag bisita
- Messages
- 114
- Reaction score
- 0
- Points
- 26
salamat for sharing idol ko kayo hehe
- Messages
- 199
- Reaction score
- 0
- Points
- 26
salamat po dito vwrry helpfull po
- Messages
- 427
- Reaction score
- 68
- Points
- 48
Sorry ngayon lang nakapag update ngayon lang kasi ulit ako nakahanap ng bagong tutorials na pwedeng pag aralan eh haha oh sya tara mag edit na tayo..
Quick Tip: Remove a Person From a Photo With Photoshop CS5’s Content Aware Feature
Tutorial Details
Program: Adobe Photoshop CS5 Extended
Difficulty: Beginner
Estimated Completion Time: 10 Minutes
With the launch of the new Adobe Suite of programs comes the long awaited Adobe Photoshop CS5. Packed with new features to speed up your workflow it truly is the most advanced edition of Photoshop to date. One of the new features we will be looking at today is called Content Aware. This feature allows you to quickly fill in a selection with surrounding content making it look like a part of the original image. In this case we will choose to remove a person from a photo, this can be done in less than five minutes. With the additional image enhancements this tutorial will take you less than 10 minutes to complete.
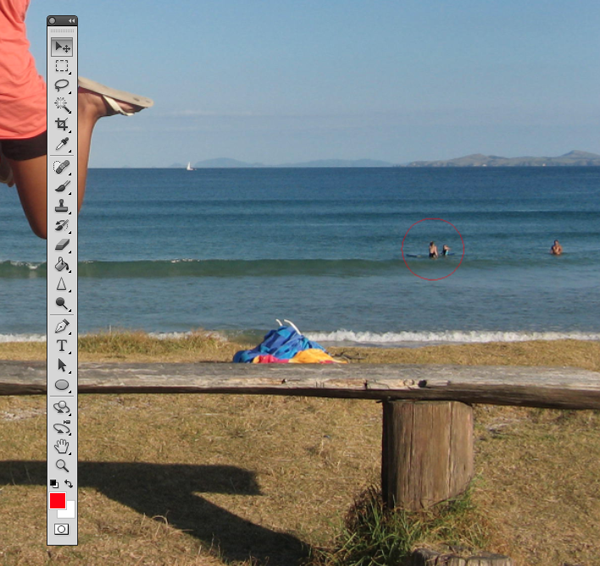
Step 1
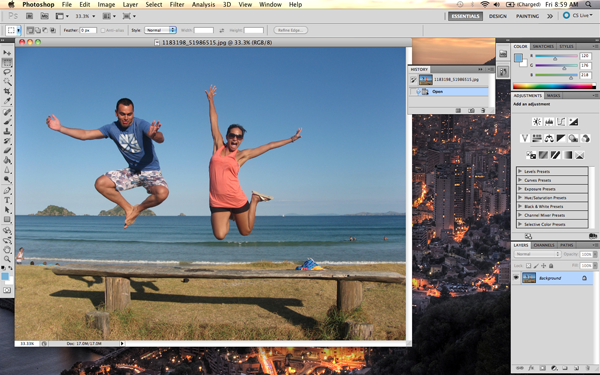
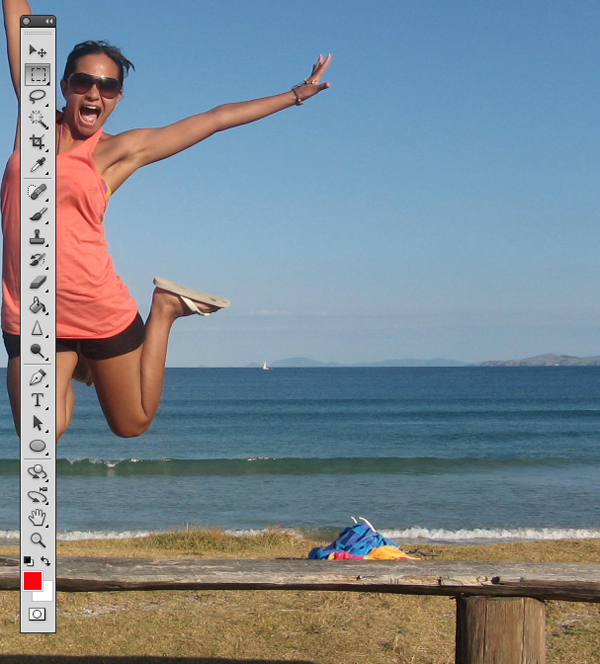
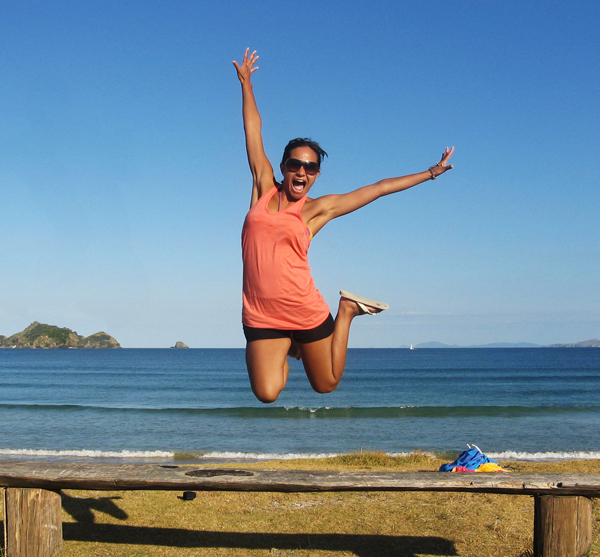
Using the content aware tool on different images produces different results. An image with a gradient background such as the sky in this image is quite tricky to work with. Open beach.jpg in Photoshop.
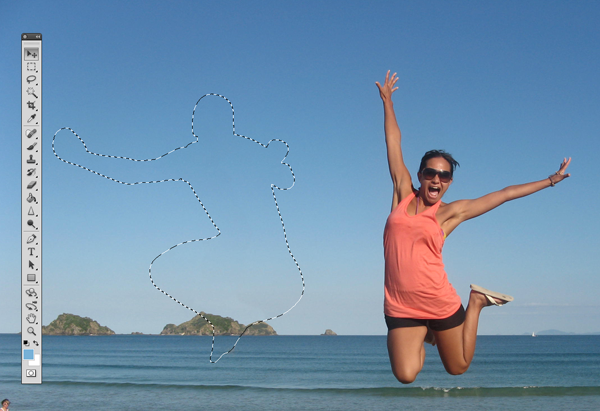
Step 2
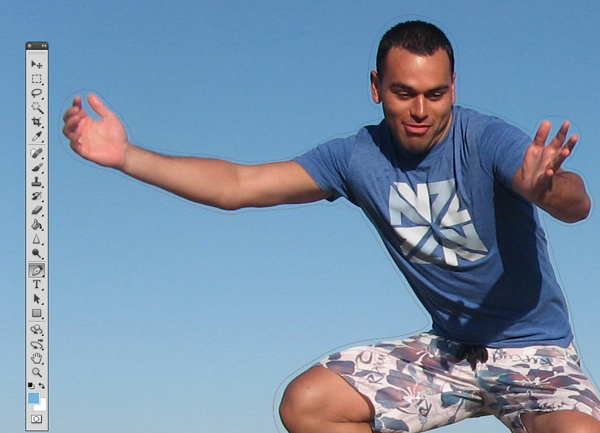
We are extracting the person on the left from this photo. Using the Pen Tool, (P) Begin by making a path around the subject. The nice thing about using content aware is that you do not have to be exact when making a selection. In fact, do your best not to cut too close to the subject.

Notice in the image below how far I am drawing the path from the subject. Try to keep this distance all the way around. If you go too close, Content Aware will take pixels from the subject. If you cut too far it will take pixels from the woman on the right.

Step 3
Once you complete the path around the subject, turn it into a selection. This can be done by right clicking on the path and selecting Make Selection.
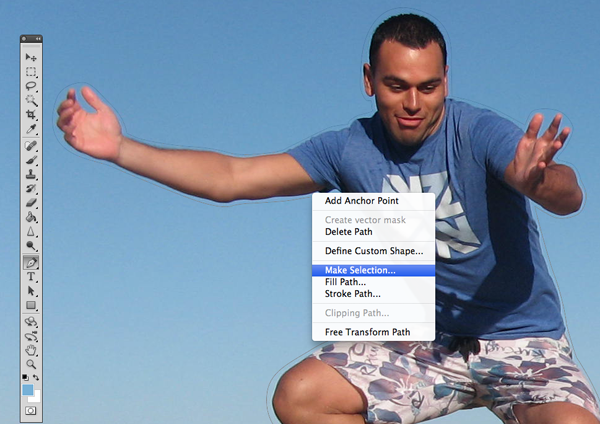
A dialog box will pop-up, make sure the feathering is set to 0px. Leave all other options as they are. Click OK.
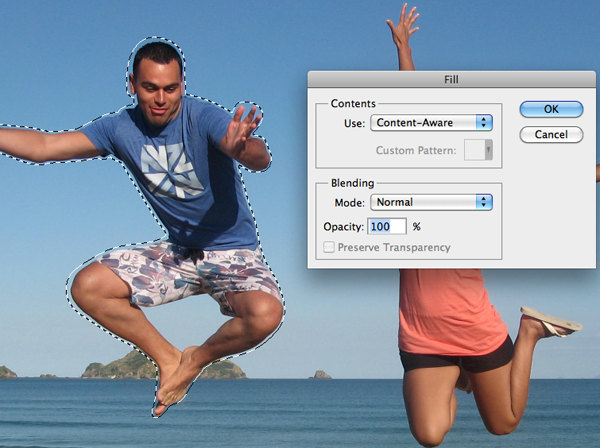
Step 4
Now we have an active selection around our subject. In this step we will make the subject disappear from the image using Content Aware Fill. To do this, go to Edit > Fill.
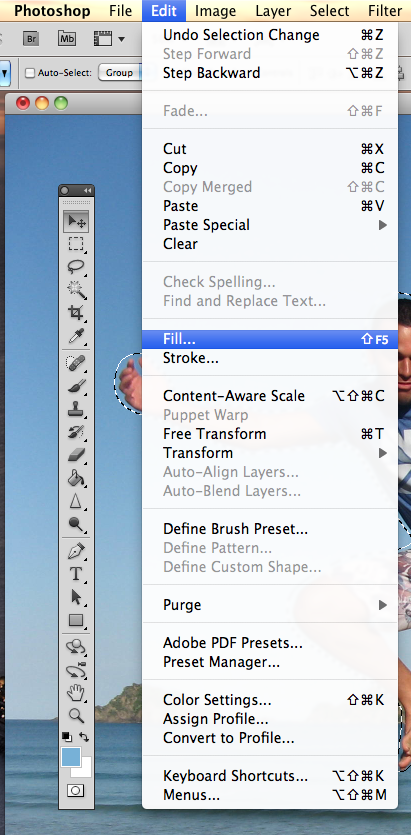
A dialog box will pop-up, make sure the Content Aware option is selected. Blending mode is set to normal and the opacity is at 100%. Hit OK.
You can cancel the selection at any time by making another selection or just clicking anywhere else on the page with any selection tool.
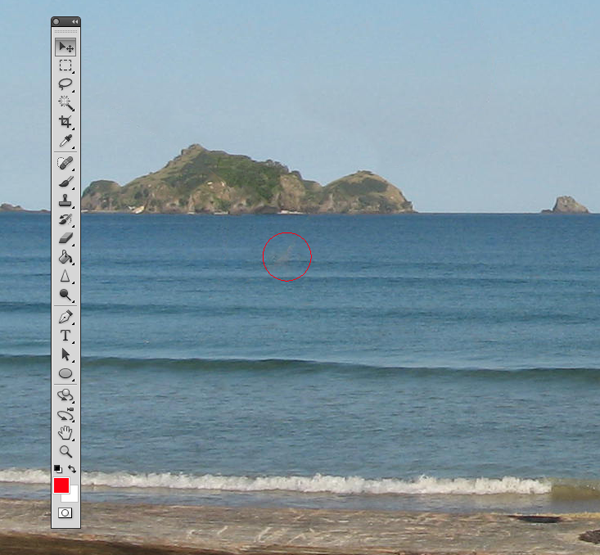
Step 5
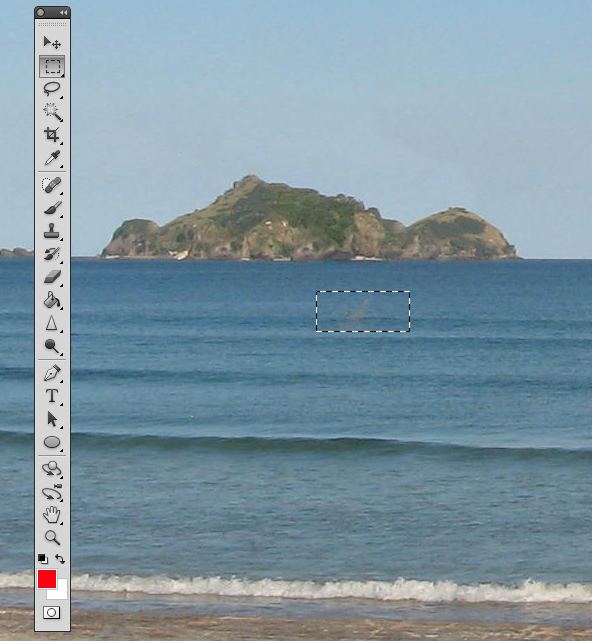
In this step we will remove some of the other artifacts in the image using the same process. The content aware tool did miss a spot where the subject’s foot originally was. To do this, draw a rectangle around the area using the rectangle selection tool. And use the content aware fill as we have done in the previous steps.

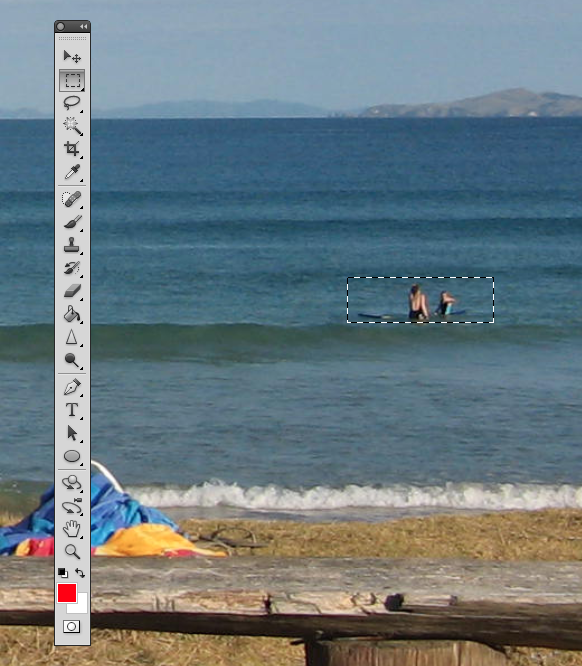
Now let’s remove the people towards the right of the image. Create a rectangle selection around them and use the steps we just demonstrated to remove them.
Step 6 (Optional)
Using the Crop Tool (C) lets crop the image so that the focus is drawn to the woman jumping. To do this, just crop out an area of the image that you would like to keep. Beware of the shadow that is left behind from the person that we have removed. You can use the Content Aware feature to remove this shadow but I have decided to crop it out altogether.TAKE NOTE: Nasasainyo kung gusto nyo pang isama ang step na to kasi optional naman sya..
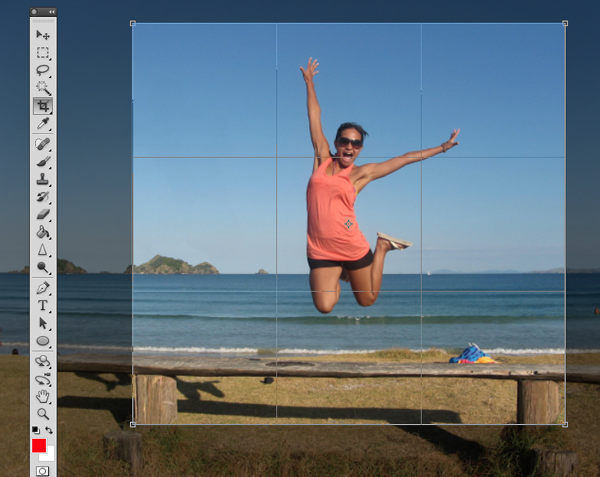
Click the checkmark at the top to keep this area. Photoshop will discard the content that is outside of your crop area.
Step 7 (Optional)
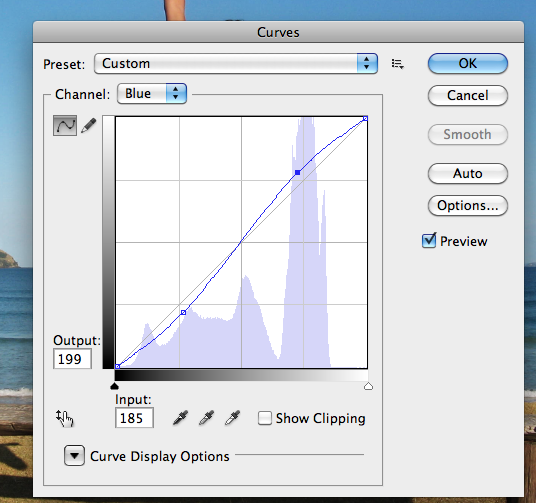
In this step we will enhance the photo by giving it a more vibrant look. The colors currently appear somewhat dull. There are many ways to accomplish this but we will use Color Curves. To do this, go to Image > Adjustments > Curves, (Cmd + M). A dialog box will pop-up and we will select each of the channels, R, G, B and work on them separately. Select the Red channel from the dropdown menu.
We are going to make two points on the graph. One in the bottom of the top right square, and one in the top of the bottom left square.
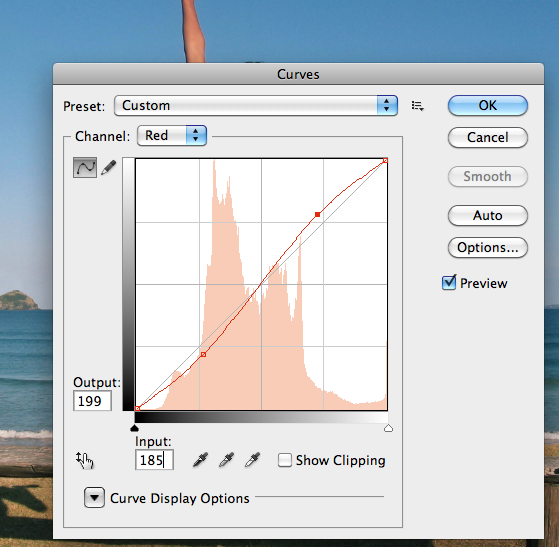
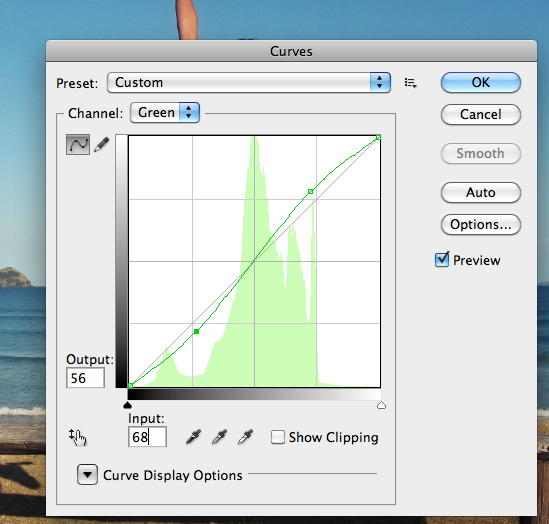
Once you have made these points, make sure you enter the values for each. For the top right point the Output value is 199, and the input value is 185. For the bottom point the values are 56 and 68, respectively. You can play around with these setting and adjust them to whatever you feel is appropriate. Repeat this for each of the colors, Green and Blue.
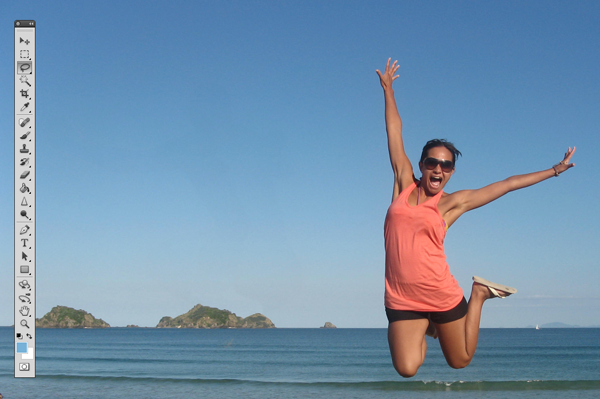
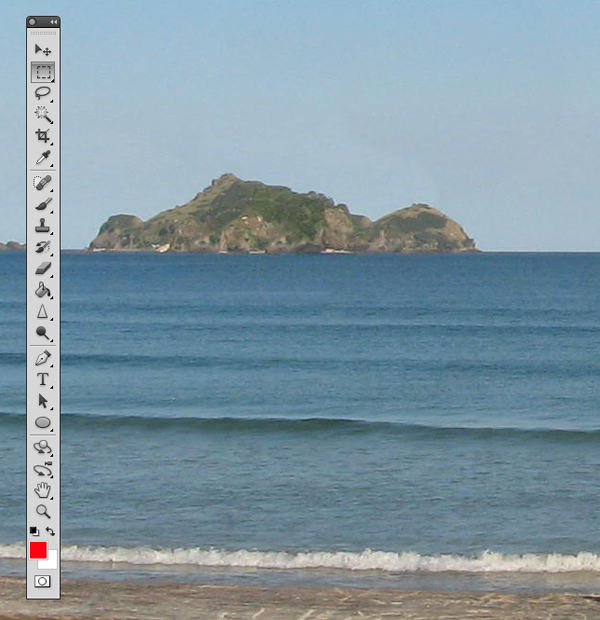
Final Image
Your image should now look something like the one seen below. As you can see, we have removed the man on her left with very little effort using Photoshop CS5′s new Content Aware Feature.I hope nagustuhan nyo matgaltagal pa ulit bago ako mag bigay ng new updates kaya sana tambay parin kayo dito..Si sir criticalgrave muna ang magbibigay ng mga updates sa inyo
Ayos to TS...sarap ng feeling kapag tinatanggal ko ang mga epal sa pictures namin ng asawa ko....hahahaha

- Messages
- 2,898
- Reaction score
- 1
- Points
- 28
- Thread Starter
- #656
samat po sa pagbisita
- Messages
- 2,898
- Reaction score
- 1
- Points
- 28
- Thread Starter
- #658
Medyo natagalan ang pag uupdate ko pasensya na guys busy lang talaga ako sa school pero di ko na patatagalin pa may nahanap ulit akong useful na tutorial na ginawa ko din hahah sana magustuhan nyo tong munti kong regalo.
Quick Tip: How To Fake a Tilt-Shift Photo
Tutorial Details
Program: Adobe Photoshop
Difficulty: Beginner
Estimated Completion Time: 20 Minutes
Tutorial Assets
London bridge
Step 1
The first step is, like you guessed, opening up our image. When creating or taking a tilt-shift photo, make sure that you’re above the area you are capturing or using a photo at that angle. The higher the better but I absolutely love this shot.

Step 2
Once you have the image open, press (Q) to edit in Quick Mask Mode. Select your Gradient Tool (G) and make sure it’s Foreground to Background with the colors being black and white. Select the type of gradient as Reflected Gradient and you’re good to start selecting which area you want the focus to be. Drag your gradient with a small stroke — it doesn’t take much to cover a lot. Everything inside the red gradient is what will be the focus point. Everything outside it will be blurred. Make sure to stop your gradient just before the edges of where you want your focus point. When we apply the Lens Blur it will smear it out a good ways so spend the extra time to get the selection just right as this will make or break a good tilt-shift photo.

Step 3
Once you have selected the area where you want the focus to be, press (Q) again to get out of Quick Mask Mode and back into Standard Mode. The red gradient will now turn into a selection area, showing you that the split is where your focus point will be.

Step 4
Now that we have our selection, go to Filter > Blur > Lens Blur. You may play around with the settings but the default works just fine for this. Click “OK” when you’re done and hit CMD/CTRL + D to deselect the selection or Select > Deselection.

Step 5
Now that the focus is set, it’s time to apply some adjustment layers. Go to Image > Adjustments. We’ll be playing with the Hue/Saturation, Brightness/Contrast, Curves and Exposure. Enter the values I have entered in the images below:

Final Image

Thats all folks sana nagustuhan nyu to eto lang kasi yung nakita kong madali eh dont worry natry ko na sya and pang begginer lang pasensya na ngayon lang ulit nakapag post ng update hopefuly tumabay pa din kayo dito. Sa mga pwedeng mag post dyan ng mga tutorials nila pwede po kayo mag post ng mga alam nyo dito bukas po ang aking thread sa mga tutorials na alam nyo salamat


- Messages
- 2,898
- Reaction score
- 1
- Points
- 28
- Thread Starter
- #660
Patesting itong tutorial mo TS.
sana may Screenshots para magaya ko rin
THANKS TALAGA TS
sir my s.s na naman po sya para masundan nyo po diba
