Symbianize Forum

Most of our features and services are available only to members, so we encourage you to login or register a new account. Registration is free, fast and simple. You only need to provide a valid email. Being a member you'll gain access to all member forums and features, post a message to ask question or provide answer, and share or find resources related to mobile phones, tablets, computers, game consoles, and multimedia.

All that and more, so what are you waiting for, click the register button and join us now! Ito ang website na ginawa ng pinoy para sa pinoy!

Beginners' Guide to Adobe Photoshop

Maraming salamat sa mga bumisita. .mag dagdag na ko ng updates pag di na ko b.c

@caezar ok lang po AYun malungkot padin. .favor naman pwede kabang mag bigay ng tutorials habang wala ako
 
UPDATE

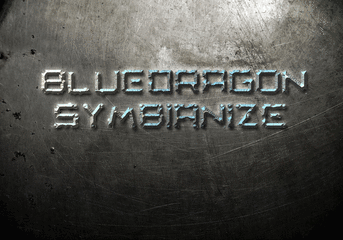
Quick Tip: Create a Steel Text Effect in Photoshop

Tutorial Details

* Difficulty: Beginner
* Estimated Completion Time: 40 Minutes
* Program: Adobe Photoshop CS+


Tutorial Assets
FREE TEXTURE METAL 1010
Metal Texture
Cafe Nero M54 – Free font

Step 1

First make a new PSD document 1000 x 700 pixels resolution 72 Dpi. Now open free texture metal 1010 and copy and paste it into your new PSD document. Press Command/Ctrl+T to transform the texture and resize it until you are happy with it.
Steel_Style_Background_Texture.jpg


Step 2

Then we are going to make the textures for the steel style. Open the Metal Texture in Photoshop. Go to Image > Image Size and apply the settings as shown below. Now go to Edit > Define Pattern name it Steel Texture and press ok. Exit this document and go back to your document from step 1.
settings-texture.jpg


Step 3

We’re going to create the following two patterns ourselves. Make a new layer in the document of step 1 by going to Layer > New > Layer. Fill this layer with white by going to Edit > Fill and choose white Now take your Brush Tool and set the brush Size to 1 px and the Hardness to 100% drawing some black lines through each other like below. The more lines, the more scratches the style gets!

If you’re ready go to Edit > Define Pattern… Name it Scratches and press ok. For the next pattern make another white layer. This time make some more scratches and use different brush sizes. If you are ready go to Edit > Define Pattern and name it Scratches 2. Now make the layers invisible. You can always use them to make another pattern if you aren’t satisfied with the result on the layer style.
scratch-pattern.jpg


scratch-pattern-2.jpg


Step 4

Now create your text with the font Cafe Nero M54 in white and apply the layer styles as shown below. Open layer effects: double click on the text layer or go to Layer > Layer Styles > Blending Options.
Text-steel-style.jpg


drop-shadow.jpg


Inner-Shadow.jpg


Outer-Glow.jpg


Inner-Glow.jpg


Bevel-en-Emboss.jpg


texture.jpg


Satin.jpg


Color-overlay.jpg


Stroke.jpg


04_Gradient.jpg


04_Pattern.jpg


Now we are getting somewhere!
layer-styles.jpg


Step 5

Duplicate the text layer from step 5 Go to Layer > Duplicate Layer and then remove the Layer styles from the new text layer. Right click on the text layer and choose > Clear Layer Style.
copy-layer.jpg


Step 6

Now we are going to apply some new layer styles on this layer. We’re making scratches on the steel and some more shadows.
bevel
Bevel-en-Emboss-2.jpg


texture-2.jpg

When you are in the texture section of the layer style click on your document area and move the texture around until your happy with it.


texture-3.jpg


Step 7

Your steel text is ready! In this step we are going to show you how to make the steel style more realistic. Make the STEEL STYLE copy layer invisible.
text-leyer.jpg


Select the STEEL STYLE layer > Copy this layer > Right click the new text layer and choose > Rasterize Type Now select the Brush Tool and take a hard brush 100% and size 15.
Brush.jpg


Zoom in and draw little around the letters with your Brush Tool. You get this effect below. Do this for all the letters.
Brush-Tool.jpg


Now select your Eraser Tool and remove some of the text like below
Erase.jpg


Step 8

Copy this text layer and apply the second Layer Style from Step 6 and you are done with the text! Select the Text Layer with the style from step 6. Go to layer > Layer Style > Copy Layer Style. Now select the new Text Layer you just copied. Go to layer > Layer Style > Paste Layer Style.
copy-layer-styles.jpg


Final Image
final.jpg
 
:thanks: sa new update bro.. :salute:

ito nga pala gawa ko.. hindi ko masyadong naperfect yung tutorial..pero ayos narin ang nagawa ko.. :D
attachment.php
 

Attachments

  • steel.gif
    steel.gif
    449.1 KB · Views: 49
Ok sir blue haha konting konting enhance na lang at makukuha muna. . salamat po sa pag bisita sa aking munting thread :)
 
Wahaha Good Pm PAnda.. Di ko pa nasubukan gumawa nang TUT SA PS.. sege pag nagka time ako...

Ayuz yung Steel Effect mo... galing nyan...:thumbsup:
 
Ok lang yun pareng caezar
 
ngayon lang ako napadaan dito ah..nice tutorials, ang tiyaga mo magturo (ng libre!)..hehe..:thumbsup: keep it up!
:nice:
 
malaraming salamat po sa pag bisita sa aking munting thread di lang puh ako ang nagtuturo dito marami pa po
 
di puh ako pro sir haha beginner lang din po ako. .masipag lang talaga puh ako magaral ng photoshop
 
post mu lang po yung mga works mu dito :) i hope nakatulong ng kahit konti puh ang mga napulut at napag aralan kong tutorials. .
 
penge naman download link ng adobe photoshop..nagexpire kasi yung sa akin.. wala ako makitang gumagana.. yung link sa first page ayaw din gumana.. thanks.. :)
 
Search kana lang po sa google sir :3 naka phone lang kasi ako ngayon
 
Bookmarked.. ayos mga tuts mo Brod...
Mlaking Tulong ito! :10: :thanks: :salute:
 
Back
Top Bottom