Symbianize Forum

Most of our features and services are available only to members, so we encourage you to login or register a new account. Registration is free, fast and simple. You only need to provide a valid email. Being a member you'll gain access to all member forums and features, post a message to ask question or provide answer, and share or find resources related to mobile phones, tablets, computers, game consoles, and multimedia.

All that and more, so what are you waiting for, click the register button and join us now! Ito ang website na ginawa ng pinoy para sa pinoy!

Elmo Activo CS6 Oil Paint Tutorial 101

elmoactivo

Amateur
Veteran Member
Messages
105
Reaction score
0
Points
126


SIMPLE STEPS USING OIL PAINTING EFFECT


Step 1

Maghanap ng maganda at malaking stock ng photo
( note: mag paalam dapat sa may ari ng photo :salute: )

Photography by: Stef + Naomi Photography
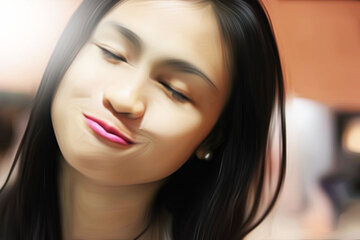
Model: Yeng Constantino


zjgyaa.jpg


Step 2

Duplicate into 3 layer ( ctrl + J )

2ed781i.jpg


Step 3

click ang first layer tapos go to
( Filter>Sharpen>Smart Sharpen )

mvp95c.jpg


Using Smart Sharpen ( amount 200% + radius1.2 px )

15pii5w.jpg


Step 4

go to ( Filter>Oil Paint ) Adjust and Balance.

2dh8iyx.jpg


Focus for Hair para ma firm ang hibla and then adjust & balance.

30ayt6v.jpg


Step 5

Use erase tool, erase part of the eyes and other edges.

2s1az4j.jpg


step 6

layer no. 2 , gamitin ulit ang Oil paint tool ( Filter>Oil paint )

2z8dlyp.jpg


Tapos adjust ng kunti, para ma linis lang yong noise.

s4b1pg.jpg


Step 7

Go to ( Image>Adjustments>Brightness/Contrast )
gamitin to para tumingkag ung second layer at makita yong kabuohan ng mata.

amxkau.jpg


Step 8

Gumawa ng puting bilog at use ( Filter>Blur>Gaussian Blur )
para maka gawa ng light shade effect.

wbc6km.jpg


Sa eclipse layer, drop down then choose Color Dodge tapos duplicate ( ctrl +J )

wiae6c.jpg


Step 10

Final touch add Brightness/Contrast and adjust para
e balance ang object tsaka ang light effect.

2a7tz04.jpg


Ito ang final hhehehe add nyo pa ng more effect para mas ok

i27uhv.jpg


enjoy !!


Shadowness | Facebook | Elmoactivo | Distorted Pixel


Last edited:
salamat bos ea :salute:

big help to para sakin :hat:

:D
 
boss ea eto ang result ng tutorial mo :giggle:


srVMkhF.png


maybe i should work on more detailed parts :D

ke gandang bae lang nare :wub:

NOTE: di ako nagpaalam nung kinuha ko picture nya :whisper:
 

wow
galing naman po
salamat dito po kuya elmo
 
@ kael yup u should work on details heheh nice start good job

@ john wlang ano man po hehehhe

@manuel : simpling effect lng ng Cs6 explore nyo lang ang mga yan galing ng mga resulta heheh


@ All hope naka tulong ung simple tuts ko heheh
 
Pwede ba yan gawin sa CS 5 Extended? haha. sige subukan ko nalang. Thanks idol! :D
 
Pag-aaralan ko ito bukas sir. Marami pong salamat sa pag share ng inyong knowledge. By the way pwede ba yan sa Photoshop CS4 Extended? Yan po kasi ang ginagamit ko sa ngayon.
 
di ko sure kung tama yung pinag gagagawa ko ginaya ko lang sa tut mo salamat sa tutorial :hat:

LIBRE LAIT sa gawa ko :lmao:

15gs95k.jpg
 
Last edited:
thanks dito TS, im gonna try this thanks
 
hehehe hope nag enjoy kau sa simple tuts na ito heheh
 
Nasundan ko naman ata Tutorial mu :thanks: dito
 

Attachments

  • 249003_552515034799255_1932729737_n_2.jpg
    249003_552515034799255_1932729737_n_2.jpg
    56.1 KB · Views: 15
well done po heheh
 
Last edited:
Sayang wala palang "Oil Paint" option 'yung CS4. :weep:

Meron bang alternative?
 
Back
Top Bottom