- Messages
- 105
- Reaction score
- 0
- Points
- 126
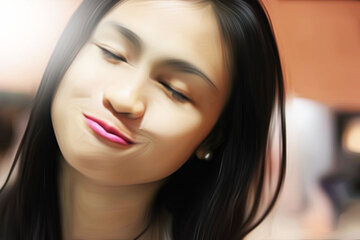
SIMPLE STEPS USING OIL PAINTING EFFECT
Step 1
Maghanap ng maganda at malaking stock ng photo
( note: mag paalam dapat sa may ari ng photo
![Salute :salute: :salute:](/images/smilies/new/salute.gif)
Photography by: Stef + Naomi Photography
Model: Yeng Constantino
![zjgyaa.jpg](/proxy.php?image=http%3A%2F%2Fi40.tinypic.com%2Fzjgyaa.jpg&hash=1562310f8a536f0bfc3baae93a762a9e)
Step 2
Duplicate into 3 layer ( ctrl + J )
![2ed781i.jpg](/proxy.php?image=http%3A%2F%2Fi40.tinypic.com%2F2ed781i.jpg&hash=affcdf32d84247c0a813532c83d6208a)
Step 3
click ang first layer tapos go to
( Filter>Sharpen>Smart Sharpen )
![mvp95c.jpg](/proxy.php?image=http%3A%2F%2Fi43.tinypic.com%2Fmvp95c.jpg&hash=0122f23bd7583201def31f452c9f3c73)
Using Smart Sharpen ( amount 200% + radius1.2 px )
![15pii5w.jpg](/proxy.php?image=http%3A%2F%2Fi42.tinypic.com%2F15pii5w.jpg&hash=fc6a793353ad448bc1dd3026f390ef1a)
Step 4
go to ( Filter>Oil Paint ) Adjust and Balance.
![2dh8iyx.jpg](/proxy.php?image=http%3A%2F%2Fi43.tinypic.com%2F2dh8iyx.jpg&hash=656948612b4e6f5fe10103130b99def3)
Focus for Hair para ma firm ang hibla and then adjust & balance.
![30ayt6v.jpg](/proxy.php?image=http%3A%2F%2Fi42.tinypic.com%2F30ayt6v.jpg&hash=29f6ccb0b200727c86d07b9bfa385b9c)
Step 5
Use erase tool, erase part of the eyes and other edges.
![2s1az4j.jpg](/proxy.php?image=http%3A%2F%2Fi39.tinypic.com%2F2s1az4j.jpg&hash=d7068f93cf171583a16536473cc77e59)
step 6
layer no. 2 , gamitin ulit ang Oil paint tool ( Filter>Oil paint )
![2z8dlyp.jpg](/proxy.php?image=http%3A%2F%2Fi43.tinypic.com%2F2z8dlyp.jpg&hash=240c983cecd03c12dbe9dcd43701326e)
Tapos adjust ng kunti, para ma linis lang yong noise.
![s4b1pg.jpg](/proxy.php?image=http%3A%2F%2Fi40.tinypic.com%2Fs4b1pg.jpg&hash=959cb3bac3a76d824b880913bf7a3995)
Step 7
Go to ( Image>Adjustments>Brightness/Contrast )
gamitin to para tumingkag ung second layer at makita yong kabuohan ng mata.
![amxkau.jpg](/proxy.php?image=http%3A%2F%2Fi40.tinypic.com%2Famxkau.jpg&hash=d7a7f994e36382705a213abb0e0dcdef)
Step 8
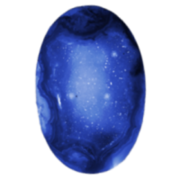
Gumawa ng puting bilog at use ( Filter>Blur>Gaussian Blur )
para maka gawa ng light shade effect.
![wbc6km.jpg](/proxy.php?image=http%3A%2F%2Fi42.tinypic.com%2Fwbc6km.jpg&hash=7c77b075271e581107e62911d4d8bbcf)
Sa eclipse layer, drop down then choose Color Dodge tapos duplicate ( ctrl +J )
![wiae6c.jpg](/proxy.php?image=http%3A%2F%2Fi44.tinypic.com%2Fwiae6c.jpg&hash=bf9085699f440dc40834fa6de1c08077)
Step 10
Final touch add Brightness/Contrast and adjust para
e balance ang object tsaka ang light effect.
![2a7tz04.jpg](/proxy.php?image=http%3A%2F%2Fi42.tinypic.com%2F2a7tz04.jpg&hash=fa0031c9ca63d6859f8c0644795a38b7)
Ito ang final hhehehe add nyo pa ng more effect para mas ok
![i27uhv.jpg](/proxy.php?image=http%3A%2F%2Fi41.tinypic.com%2Fi27uhv.jpg&hash=046193c0098af0f1a6f9a140e34be49f)
enjoy !!
Shadowness | Facebook | Elmoactivo | Distorted Pixel
Last edited: