- Messages
- 1,804
- Reaction score
- 59
- Points
- 113


USEFUL RASPBERRY PI TUTORIALS:
https://raspiblog.noblogs.org/
[h=4]
Model A+
Model B+
Model 2 B
Pi Zero
Pi 3 Model B
Pi 3 Model B+ (until January 2023)
Camera Board Module
Touch Screen Display
Pi Casing
Pi 3 B Official PSU BLACK RS-PH
FAQ
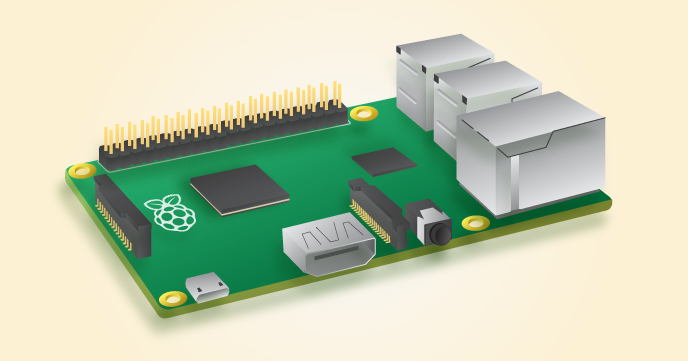
WHAT IS A RASPBERRY PI?[/h]The Raspberry Pi is a credit-card sized computer that plugs into your TV and a keyboard. It is a capable little computer which can be used in electronics projects, and for many of the things that your desktop PC does, like spreadsheets, word-processing, browsing the internet and games. It also plays high-definition video. We want to see it being used by kids all over the world to learn programming.
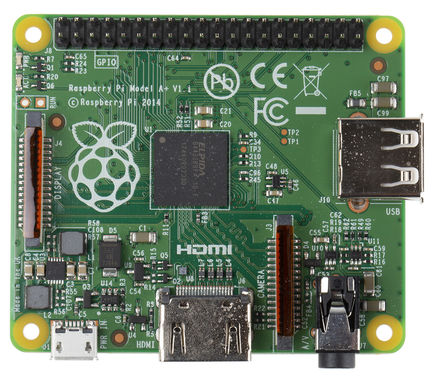
The Model A+ is the low-cost variant of the Raspberry Pi. It replaced the original Model A in November 2014. Compared to the Model A it has:
More GPIO. The GPIO header has grown to 40 pins, while retaining the same pinout for the first 26 pins as the Model A and B.
Micro SD. The old friction-fit SD card socket has been replaced with a much nicer push-push micro SD version.
Lower power consumption. By replacing linear regulators with switching ones we’ve reduced power consumption by between 0.5W and 1W.
Better audio. The audio circuit incorporates a dedicated low-noise power supply.
Smaller, neater form factor. We’ve aligned the USB connector with the board edge, moved composite video onto the 3.5mm jack, and added four squarely-placed mounting holes. Model A+ is approximately 2cm shorter than the Model A.
We recommend the Model A+ for for embedded projects and projects which require very low power, and which do not require Ethernet or multiple USB ports.
See the documentation for technical details.
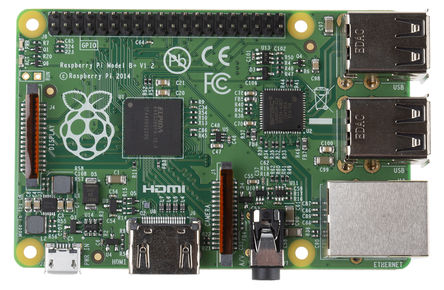
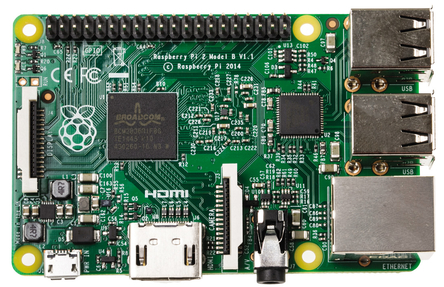
The Raspberry Pi 2 Model B is the second generation Raspberry Pi. It replaced the original Raspberry Pi 1 Model B+ in February 2015. Compared to the Raspberry Pi 1 it has:
A 900MHz quad-core ARM Cortex-A7 CPU
1GB RAM
Like the (Pi 1) Model B+, it also has:
4 USB ports
40 GPIO pins
Full HDMI port
Ethernet port
Combined 3.5mm audio jack and composite video
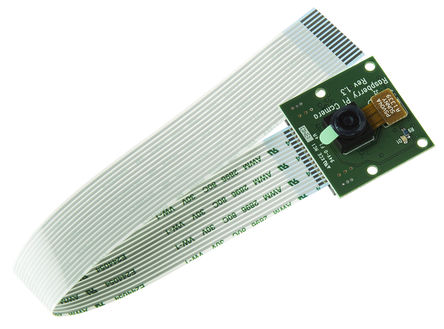
Camera interface (CSI)
Display interface (DSI)
Micro SD card slot
VideoCore IV 3D graphics core
Because it has an ARMv7 processor, it can run the full range of ARM GNU/Linux distributions, including Snappy Ubuntu Core, as well as Microsoft Windows 10 (see the blog for more information).
The Raspberry Pi 2 has an identical form factor to the previous (Pi 1) Model B+ and has complete compatibility with Raspberry Pi 1.
We recommend the Raspberry Pi 2 Model B for use in schools: it offers more flexibility for learners than the leaner (Pi 1) Model A+, which is more useful for embedded projects and projects which require very low power.
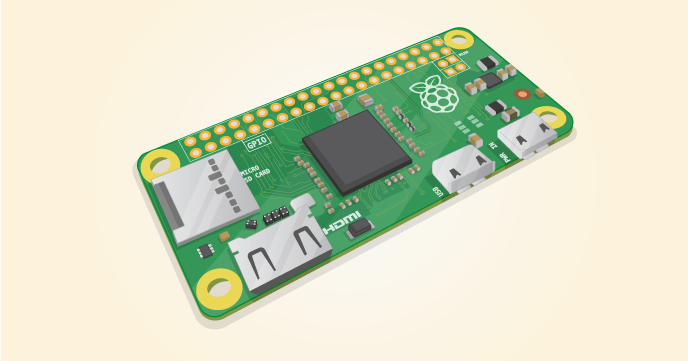
The Raspberry Pi Zero is half the size of a Model A+, with twice the utility. A tiny Raspberry Pi that’s affordable enough for any project!
1Ghz, Single-core CPU
512MB RAM
Mini HDMI and USB On-The-Go ports
Micro USB power
HAT-compatible 40-pin header
Composite video and reset headers
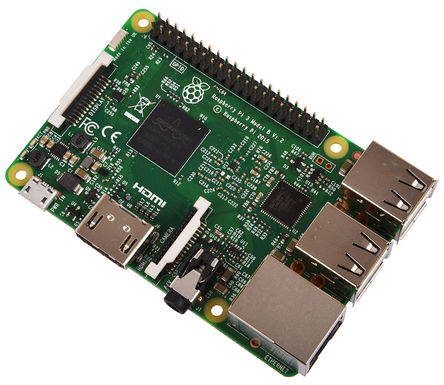
Raspberry Pi 3 Model B SBC
The Raspberry Pi 3 Model B looks identical to the Pi 2 B at first glance. It is the same size and has much of the same components on board. So what is the difference? The new Pi 3 brings more processing power and on-board connectivity, saving you time with the development of your applications. Perfect for your Internet of Things (IoT) designs.
Pi 3 compared to Pi 2
More processor speed. The CPU on the Pi 3 is one and a half times faster at 1.2 GHz. Your Pi board performs better.
On-board connectivity. The Pi 3 features 802.11 b/g/n Wireless LAN and Bluetooth Classic & Low Energy (BLE). You can get connected much quicker without the need for any external device.
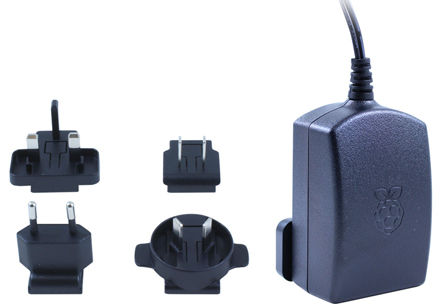
2.5 A power supply. With more processor speed and on-board connectivity, you'll need more power. Power supplies for previous Pi boards will not be sufficient. You will need the Official Raspberry Pi Power Supply (9098126 — white) or (9098135 — black).
New components. The Pi 3 features a chip antenna where status LEDs were located previously. The status LEDs are still on the board, right next to the microSD card slot.
Features & Benefits of the Pi 3
•Broadcom BCM2837 chipset running at 1.2 GHz
•64-bit quad-core ARM Cortex-A53
•802.11 b/g/n Wireless LAN (NO EXTERNAL ANTENNA OUTPUT)
•Bluetooth 4.1 (Classic & Low Energy) (NO EXTERNAL ANTENNA OUTPUT)
•Dual core Videocore IV® Multimedia co-processor
•1 GB LPDDR2 memory
•Supports all the latest ARM GNU/Linux distributions
•microUSB connector for 2.5 A power supply
•1 x 10/100 Ethernet port
•1 x HDMI video/audio connector
•1 x RCA video/audio connector
•4 x USB 2.0 ports
•40 GPIO pins
•Chip antenna
•DSI display connector
•microSD card slot
•Dimensions: 85 x 56 x 17 mm
Note
The Official Pi 3 Power Supply Unit is for the Pi 3 board only. The power supply unit is not for general purpose power supply.
The Raspberry Pi Zero W extends the Pi Zero family. Launched at the end of February 2017, the Pi Zero W has all the functionality of the original Pi Zero, but comes with with added connectivity, consisting of:
802.11 b/g/n wireless LAN
Bluetooth 4.1
Bluetooth Low Energy (BLE)
Like the Pi Zero, it also has:
1GHz, single-core CPU
512MB RAM
Mini HDMI and USB On-The-Go ports
Micro USB power
HAT-compatible 40-pin header
Composite video and reset headers
CSI camera connector
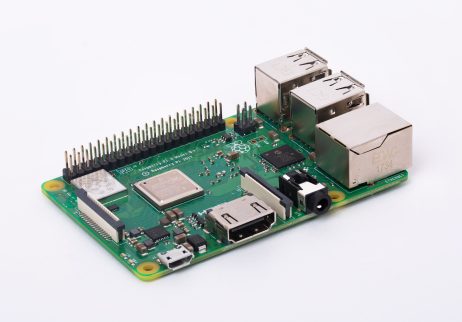
The Raspberry Pi 3 Model B+ is the latest product in the Raspberry Pi 3 range.
• Broadcom BCM2837B0, Cortex-A53 (ARMv8) 64-bit SoC @ 1.4GHz
• 1GB LPDDR2 SDRAM
• 2.4GHz and 5GHz IEEE 802.11.b/g/n/ac wireless LAN, Bluetooth 4.2, BLE (NO EXTERNAL ANTENNA OUTPUT)
• Gigabit Ethernet over USB 2.0 (maximum throughput 300 Mbps)
• Extended 40-pin GPIO header
• Full-size HDMI
• 4 USB 2.0 ports
• CSI camera port for connecting a Raspberry Pi camera
• DSI display port for connecting a Raspberry Pi touchscreen display
• 4-pole stereo output and composite video port
• Micro SD port for loading your operating system and storing data
• 5V/2.5A DC power input (requires official PSU or use a quality USB to micro Cable and DC Buck converter MP1584)
• Power-over-Ethernet (PoE) support (requires separate PoE HAT)
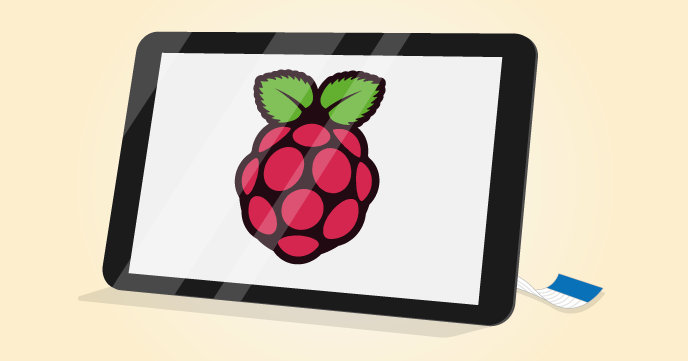
The 7″ Touchscreen Monitor for Raspberry Pi gives users the ability to create all-in-one, integrated projects such as tablets, infotainment systems and embedded projects. The 800 x 480 display connects via an adapter board which handles power and signal conversion. Only two connections to the Pi are required; power from the Pi’s GPIO port and a ribbon cable that connects to the DSI port present on all Raspberry Pis. Touchscreen drivers with support for 10-finger touch and an on-screen keyboard will be integrated into the latest Raspbian OS for full functionality without a physical keyboard or mouse.
Turn your Raspberry Pi into a touch screen tablet, infotainment system, or standalone device.
Truly Interactive – the latest software drivers will support a virtual ‘on screen’ keyboard, so there is no need to plug in a keyboard and mouse.
Make your own Internet of Things (IoT) devices including a visual display. Simply connect your Raspberry Pi, develop a Python script to interact with the display, and you’re ready to create your own home automation devices with touch screen capability.
A range of educational software and programs available on the Raspberry Pi will be touch enabled, making learning and programming easier on the Raspberry Pi.
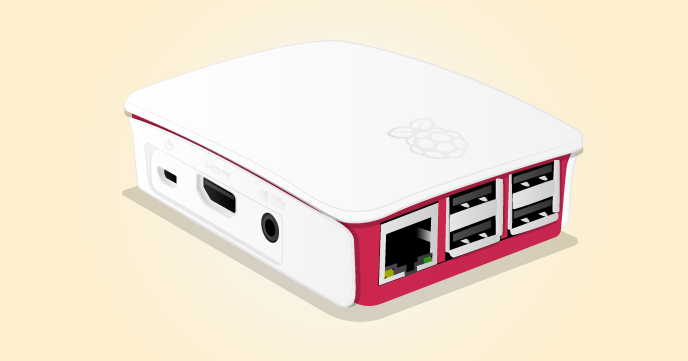
The official Raspberry Pi case is finally here!
High-quality ABS construction
Removable side panels and lid for easy access to GPIO, camera and display connectors
Light pipes for power and activity LEDs
Extraordinarily handsome
[h=4]WHERE CAN I BUY A RASPBERRY PI?[/h]You can buy a Raspberry Pi directly from our website. You can also buy from our main distributors, Premier Farnell/Element14 and RS Components/Allied Electronics. Both distributors sell all over the world. There are also many resellers of Raspberry Pis, both online and in bricks-and-mortar stores. -Buying and Shipping -Top
[h=4]RS Philippines: http://ph.rs-online.com/web/generalDisplay.html?id=raspberrypi
HOW MUCH DOES IT COST?[/h]The Model A+ costs $20, the Model B+ costs $25, and the Pi 2 costs $35, plus local taxes and shipping/handling fees.
Philippine Peso (as of 12-23-15):
Model A+ PHP1,199.42 - Php1.1k+
Model B+ PHP1,200.00 Php 1.2k+
Model 2 B PHP1,925.45 - Php 1.7k+
Model 3 B PHP 1899.25 (AS of MAR 1 2017
Model 3 B+
Model 0
Model 0 W (bulk order hirap mahanap kung meron lagpas PHP 2K ang benta isang set)
[h=4]WHAT IS THE USERNAME AND PASSWORD FOR THE RASPBERRY PI?[/h]The default username for Raspbian is “pi” (without any quotation marks) and the default password is “raspberry” (again, do not include the quotation marks). If this does not work, check the information about your specific distro on the
HOW DO I CONNECT A MOUSE AND KEYBOARD?
The Model A/A+ has one USB port, the Model B has two ports, and the Model B+ and 2B have four ports. These can be used to connect most USB 2.0 devices. Additional USB devices such as mice, keyboards, network adapters and external storage can be connected via a USB hub.
[h=4] WHERE IS THE ON/OFF SWITCH?[/h]There is no on/off switch! To switch on, just plug it in. To switch off: If you are in the graphical environment, either exit to the bash prompt or open the terminal. From the bash prompt or terminal shut down the Raspberry Pi by entering “sudo halt -h” (without the quotation marks). Wait until all the LEDs except the power LED are off, then wait an additional second to make sure the SD card can finish its wear leveling tasks and write actions. You can now safely unplug the Raspberry Pi. Failure to properly shut the Raspberry Pi may corrupt your SD card, which would mean you would have to re-image it.
[h=4] WHAT ARE THE DIMENSIONS OF THE RASPBERRY PI?[/h]The Raspberry Pi measures 85.60mm x 56mm x 21mm (or roughly 3.37″ x 2.21″ x 0.83″), with a little overlap for the SD card and connectors which project over the edges. It weighs 45g
[h=4]HOW POWERFUL IS IT?[/h]The GPU provides OpenGL ES 2.0, hardware-accelerated OpenVG, and 1080p30 H.264 high-profile encode and decode. The GPU is capable of 1Gpixel/s, 1.5Gtexel/s or 24 GFLOPs of general purpose compute and features a bunch of texture filtering and DMA infrastructure. This means that graphics capabilities are roughly equivalent to the original Xbox’s level of performance. Overall real world performance for models A, A+, B & B+ is something like a 300MHz Pentium 2, only with much, much swankier graphics. The Model 2B is approximately equivalent to an Athlon Thunderbird running at 1.1GHz: again, it has the much higher-quality graphics that come from using the same GPU as in previous models
[h=4]WHAT ARE THE POWER REQUIREMENTS?[/h]The device is powered by 5v micro USB. Exactly how much current (mA) the Raspberry Pi requires is dependent on what you hook up to it. We have found that purchasing a 1.2A (1200mA) power supply from a reputable retailer will provide you with ample power to run your Raspberry Pi for most applications, though you may want to get a 2.5A (2500mA) if you want to use all 4 USB ports on the Models B+/2B without using an external powered USB hub. The table below outlines the power requirements of each model.
[TD]Raspberry Pi Model A+[/TD]
[TD]700mA[/TD]
[TD]500mA[/TD]
[TD]180mA[/TD]
[/TR]
The specific current requirements of each model are dependent on the use case: the PSU recommendations are based on “typical maximum” current consumption, the typical current consumption is for each board in a “desktop computer” configuration. The Raspberry Pi model A, A+, and B can supply a maximum of 500mA to downstream USB peripherals. If you wish to connect a high-power USB device then it is recommended to connect a powered USB hub to the Pi and connect your peripherals to the USB hub. The Raspberry Pi model B+ and 2B can supply 600mA/1.2A to downstream USB peripherals, switchable by a firmware setting. This allows the vast majority of USB devices to be connected directly to these models, assuming the upstream power supply has sufficient available current. Very high-current devices or devices can draw a surge current such as certain 3G modems and USB hard disks will still require an external powered USB hub. The power requirements of the Raspberry Pi increase as you make use of the various interfaces on the Raspberry Pi. The GPIO pins can draw 50mA safely (that is 50mA distributed across all the pins! An individual GPIO pin can only safely draw 16mA), the HDMI port uses 50mA, the camera module requires 250mA, and keyboards and mice can take as little as 100mA or as much as 1000mA! Check the power rating of the devices you plan to connect to the Pi and purchase a power supply accordingly. If you’re not sure, we would advise you to buy a powered hub
[h=4]WHAT OPERATING SYSTEM (OS) DOES IT USE?[/h]There are several official distributions (distros) available on our downloads page. New users will probably find the NOOBs installer the easiest to work with, as it walks you through the download and installation of a specific distro. The recommended distro is Raspbian, which is specifically designed for the Raspberry Pi and which our engineers are constantly optimising. It is, however, a straightforward process to replace the root partition on the SD card with another ARM Linux distro, so we encourage you to try out several distros to see which one you like the most. The OS is stored on the SD card
[h=4]WHAT LINUX DISTROS RUN ON THE PI?[/h]Raspbian (based on Debian), Arch Linux and Pidora run on Raspberry Pi 1 and 2. Ubuntu MATE and Ubuntu Snappy Core also run on Pi 2 only. See our downloads page for more information.
[h=4]WHAT SIZE SD CARD DO I NEED?[/h]Whether you want to use the NOOBS installer or a standalone distro image, the minimum size SD card we recommend using is 8GB. This will give you the free space you need to install additional packages or make programs of your own
[h=4]DOES THE DEVICE SUPPORT NETWORKING?[/h]The Model B, Model B+ and Model 2B versions of the device have built in 10/100 wired Ethernet. There is no Ethernet on the Model A or Model A+ versions.
Raspberry Pi Official Magazine: https://www.raspberrypi.org/magpi/
GPIO PIN OUT - credits kay shiangtao

Update ko to pag na-receive ko yung Pi 2B ko.
UPDATE: NA RECEIVE KO SIYA JAN 4, since DEC 22 Order date ko pero DEC 29 pa lang nila narecive sa 2go (5 working days sakto, tinamaan kase ng holidays kaya tumagal...
DELIVED VIA 2GO: around tanghali

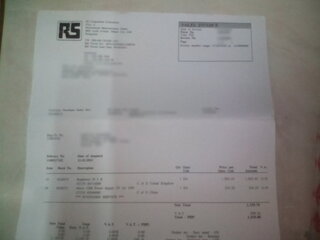
RS Invoice

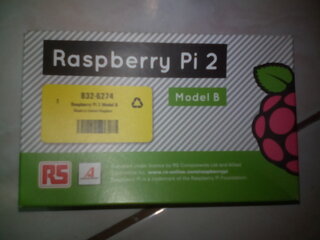
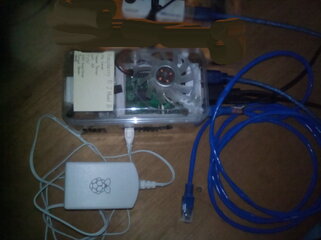
RASPBERRY PI 2 Model B Box:

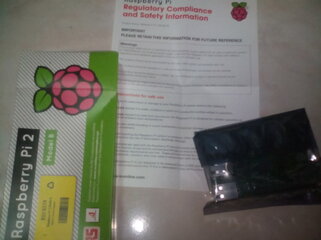
Contents:
-Anti Static (ESD) Plastic
-Safety Paper
-Raspberry pi 2

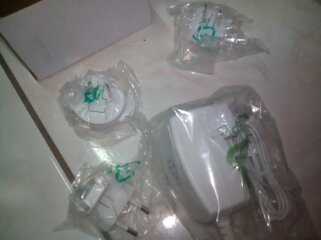
Official Pi Power Supply Adapter

SAFETY PRECAUTIONS:
WHEN HANDLING THE BOARD:
- Hold the board on its edges only to avoid Electro Static Discharge (ESD
- DO NOT REMOVE THE BOARD ON THE ANTI STATIC PLASTIC UNTIL USING
- DO NOT EXPOSE TO WET, MOIST ENVIRONMENT
- DO NOT EXPOSE TO XENON FLASH (XENON CAMERAS IT WILL TRIGGER SHUTDOWN AND MAY CAUSEDO SD CARD CORRUPTION
- DO NOT PLACE ON CONDUCTIVE AREAS
USING THE PI:
- DO NOT UNPLUG THE POWER UNLESS THE PI IS HALTED (SHUT DOWNED
- DO NOT TOUCH OR CONDUCT THE ENTIRE BOARD AND/OR THE GPIO PORTS
Powering your Raspberry Pi
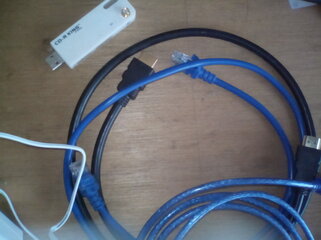
Requirements:
- TV/Monitor HDMI (recommended) or HDMI to VGA Active converter
- USB Adaptor Output 5V 3A (recommended Pi PSU 2A/2.5A)
- USB Cable
- RJ45 Ethernet Cable
- USB Wireless Adaptor (IFF NOT Pi3/3B+/0W)
- USB Mouse
- USB Keyboard
- HDMI - HDMI Full Cable
- Class 4, 6 or 10 MicroSD Card 8GB or higher
- Casing DIY or 3D printed

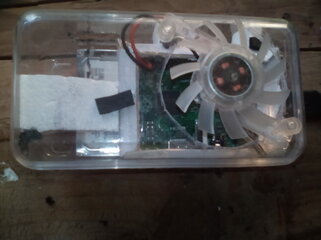
MY IMPROVISED PI CASING AND SERVER

1. Download the Raspbian from the Pi's official website and burn to MicroSD
2. Plugin USB Adaptor, HDMI , HDMI TV, MicroSD, RJ45
3. Pi will now boot to tty (terminal session.
4. Type in:
5. Update Pi
Kung gusto mo ng Desktop Interface Graphical User Interface type mo: $ startx
6. Gawan mo ng Casing kung di ka bumili ng casing niya, lagyan mo din ng Fan at heatsink kung mag-ooverclock ka or kung napakainit sa bahay mo...
7. Happy Hacking
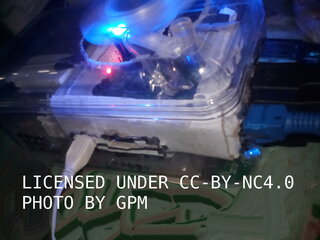
Raspberry Pi with RJ45, PSU, WiFi adapter local, HDD, SATA to USB chip, Ferero, 5v fan cooler

Powered on:

Share niyo mga Pi's niyo. or kung wala pa kayo Order na!
Kung ayaw niyo sa Pi dahil hindi siya 100% Free and Open Source/Open Hardware ipost niyo din ang iba pang Pi's tulad ng Odroid, Orange Pi, Banana Pi, Pine64, C.H.I.P atbp.
PS. 24/7 nakabukas to dahil ito na ang headless server ko sa bahay. Dapat proper ventilated siya at walang alikabok sa inyo.
This content is licensed under Creative Commons ShareAlike 4.0. CC BY-SA unless otherwise stated.
Credits: RaspberryPi ORG FAQ
RS Philippines
Myself
shiantao*
Symbianize
USEFUL LINKS:
pinout.xyz
https://raspiblog.noblogs.org/
[h=4]
Model A+
Model B+
Model 2 B
Pi Zero
Pi 3 Model B
Pi 3 Model B+ (until January 2023)
Camera Board Module
Touch Screen Display
Pi Casing
Pi 3 B Official PSU BLACK RS-PH
FAQ
WHAT IS A RASPBERRY PI?[/h]The Raspberry Pi is a credit-card sized computer that plugs into your TV and a keyboard. It is a capable little computer which can be used in electronics projects, and for many of the things that your desktop PC does, like spreadsheets, word-processing, browsing the internet and games. It also plays high-definition video. We want to see it being used by kids all over the world to learn programming.
The Model A+ is the low-cost variant of the Raspberry Pi. It replaced the original Model A in November 2014. Compared to the Model A it has:
More GPIO. The GPIO header has grown to 40 pins, while retaining the same pinout for the first 26 pins as the Model A and B.
Micro SD. The old friction-fit SD card socket has been replaced with a much nicer push-push micro SD version.
Lower power consumption. By replacing linear regulators with switching ones we’ve reduced power consumption by between 0.5W and 1W.
Better audio. The audio circuit incorporates a dedicated low-noise power supply.
Smaller, neater form factor. We’ve aligned the USB connector with the board edge, moved composite video onto the 3.5mm jack, and added four squarely-placed mounting holes. Model A+ is approximately 2cm shorter than the Model A.
We recommend the Model A+ for for embedded projects and projects which require very low power, and which do not require Ethernet or multiple USB ports.
See the documentation for technical details.
The Raspberry Pi 2 Model B is the second generation Raspberry Pi. It replaced the original Raspberry Pi 1 Model B+ in February 2015. Compared to the Raspberry Pi 1 it has:
A 900MHz quad-core ARM Cortex-A7 CPU
1GB RAM
Like the (Pi 1) Model B+, it also has:
4 USB ports
40 GPIO pins
Full HDMI port
Ethernet port
Combined 3.5mm audio jack and composite video
Camera interface (CSI)
Display interface (DSI)
Micro SD card slot
VideoCore IV 3D graphics core
Because it has an ARMv7 processor, it can run the full range of ARM GNU/Linux distributions, including Snappy Ubuntu Core, as well as Microsoft Windows 10 (see the blog for more information).
The Raspberry Pi 2 has an identical form factor to the previous (Pi 1) Model B+ and has complete compatibility with Raspberry Pi 1.
We recommend the Raspberry Pi 2 Model B for use in schools: it offers more flexibility for learners than the leaner (Pi 1) Model A+, which is more useful for embedded projects and projects which require very low power.
The Raspberry Pi Zero is half the size of a Model A+, with twice the utility. A tiny Raspberry Pi that’s affordable enough for any project!
1Ghz, Single-core CPU
512MB RAM
Mini HDMI and USB On-The-Go ports
Micro USB power
HAT-compatible 40-pin header
Composite video and reset headers
Raspberry Pi 3 Model B SBC
The Raspberry Pi 3 Model B looks identical to the Pi 2 B at first glance. It is the same size and has much of the same components on board. So what is the difference? The new Pi 3 brings more processing power and on-board connectivity, saving you time with the development of your applications. Perfect for your Internet of Things (IoT) designs.
Pi 3 compared to Pi 2
More processor speed. The CPU on the Pi 3 is one and a half times faster at 1.2 GHz. Your Pi board performs better.
On-board connectivity. The Pi 3 features 802.11 b/g/n Wireless LAN and Bluetooth Classic & Low Energy (BLE). You can get connected much quicker without the need for any external device.
2.5 A power supply. With more processor speed and on-board connectivity, you'll need more power. Power supplies for previous Pi boards will not be sufficient. You will need the Official Raspberry Pi Power Supply (9098126 — white) or (9098135 — black).
New components. The Pi 3 features a chip antenna where status LEDs were located previously. The status LEDs are still on the board, right next to the microSD card slot.
Features & Benefits of the Pi 3
•Broadcom BCM2837 chipset running at 1.2 GHz
•64-bit quad-core ARM Cortex-A53
•802.11 b/g/n Wireless LAN (NO EXTERNAL ANTENNA OUTPUT)
•Bluetooth 4.1 (Classic & Low Energy) (NO EXTERNAL ANTENNA OUTPUT)
•Dual core Videocore IV® Multimedia co-processor
•1 GB LPDDR2 memory
•Supports all the latest ARM GNU/Linux distributions
•microUSB connector for 2.5 A power supply
•1 x 10/100 Ethernet port
•1 x HDMI video/audio connector
•1 x RCA video/audio connector
•4 x USB 2.0 ports
•40 GPIO pins
•Chip antenna
•DSI display connector
•microSD card slot
•Dimensions: 85 x 56 x 17 mm
Note
The Official Pi 3 Power Supply Unit is for the Pi 3 board only. The power supply unit is not for general purpose power supply.
The Raspberry Pi Zero W extends the Pi Zero family. Launched at the end of February 2017, the Pi Zero W has all the functionality of the original Pi Zero, but comes with with added connectivity, consisting of:
802.11 b/g/n wireless LAN
Bluetooth 4.1
Bluetooth Low Energy (BLE)
Like the Pi Zero, it also has:
1GHz, single-core CPU
512MB RAM
Mini HDMI and USB On-The-Go ports
Micro USB power
HAT-compatible 40-pin header
Composite video and reset headers
CSI camera connector
The Raspberry Pi 3 Model B+ is the latest product in the Raspberry Pi 3 range.
• Broadcom BCM2837B0, Cortex-A53 (ARMv8) 64-bit SoC @ 1.4GHz
• 1GB LPDDR2 SDRAM
• 2.4GHz and 5GHz IEEE 802.11.b/g/n/ac wireless LAN, Bluetooth 4.2, BLE (NO EXTERNAL ANTENNA OUTPUT)
• Gigabit Ethernet over USB 2.0 (maximum throughput 300 Mbps)
• Extended 40-pin GPIO header
• Full-size HDMI
• 4 USB 2.0 ports
• CSI camera port for connecting a Raspberry Pi camera
• DSI display port for connecting a Raspberry Pi touchscreen display
• 4-pole stereo output and composite video port
• Micro SD port for loading your operating system and storing data
• 5V/2.5A DC power input (requires official PSU or use a quality USB to micro Cable and DC Buck converter MP1584)
• Power-over-Ethernet (PoE) support (requires separate PoE HAT)
The 7″ Touchscreen Monitor for Raspberry Pi gives users the ability to create all-in-one, integrated projects such as tablets, infotainment systems and embedded projects. The 800 x 480 display connects via an adapter board which handles power and signal conversion. Only two connections to the Pi are required; power from the Pi’s GPIO port and a ribbon cable that connects to the DSI port present on all Raspberry Pis. Touchscreen drivers with support for 10-finger touch and an on-screen keyboard will be integrated into the latest Raspbian OS for full functionality without a physical keyboard or mouse.
Turn your Raspberry Pi into a touch screen tablet, infotainment system, or standalone device.
Truly Interactive – the latest software drivers will support a virtual ‘on screen’ keyboard, so there is no need to plug in a keyboard and mouse.
Make your own Internet of Things (IoT) devices including a visual display. Simply connect your Raspberry Pi, develop a Python script to interact with the display, and you’re ready to create your own home automation devices with touch screen capability.
A range of educational software and programs available on the Raspberry Pi will be touch enabled, making learning and programming easier on the Raspberry Pi.
The official Raspberry Pi case is finally here!
High-quality ABS construction
Removable side panels and lid for easy access to GPIO, camera and display connectors
Light pipes for power and activity LEDs
Extraordinarily handsome
[h=4]WHERE CAN I BUY A RASPBERRY PI?[/h]You can buy a Raspberry Pi directly from our website. You can also buy from our main distributors, Premier Farnell/Element14 and RS Components/Allied Electronics. Both distributors sell all over the world. There are also many resellers of Raspberry Pis, both online and in bricks-and-mortar stores. -Buying and Shipping -Top
[h=4]RS Philippines: http://ph.rs-online.com/web/generalDisplay.html?id=raspberrypi
HOW MUCH DOES IT COST?[/h]The Model A+ costs $20, the Model B+ costs $25, and the Pi 2 costs $35, plus local taxes and shipping/handling fees.
Philippine Peso (as of 12-23-15):
Model A+ PHP1,199.42 - Php1.1k+
Model B+ PHP1,200.00 Php 1.2k+
Model 2 B PHP1,925.45 - Php 1.7k+
Model 3 B PHP 1899.25 (AS of MAR 1 2017
Model 3 B+
Model 0
Model 0 W (bulk order hirap mahanap kung meron lagpas PHP 2K ang benta isang set)
[h=4]WHAT IS THE USERNAME AND PASSWORD FOR THE RASPBERRY PI?[/h]The default username for Raspbian is “pi” (without any quotation marks) and the default password is “raspberry” (again, do not include the quotation marks). If this does not work, check the information about your specific distro on the
HOW DO I CONNECT A MOUSE AND KEYBOARD?
The Model A/A+ has one USB port, the Model B has two ports, and the Model B+ and 2B have four ports. These can be used to connect most USB 2.0 devices. Additional USB devices such as mice, keyboards, network adapters and external storage can be connected via a USB hub.
[h=4] WHERE IS THE ON/OFF SWITCH?[/h]There is no on/off switch! To switch on, just plug it in. To switch off: If you are in the graphical environment, either exit to the bash prompt or open the terminal. From the bash prompt or terminal shut down the Raspberry Pi by entering “sudo halt -h” (without the quotation marks). Wait until all the LEDs except the power LED are off, then wait an additional second to make sure the SD card can finish its wear leveling tasks and write actions. You can now safely unplug the Raspberry Pi. Failure to properly shut the Raspberry Pi may corrupt your SD card, which would mean you would have to re-image it.
[h=4] WHAT ARE THE DIMENSIONS OF THE RASPBERRY PI?[/h]The Raspberry Pi measures 85.60mm x 56mm x 21mm (or roughly 3.37″ x 2.21″ x 0.83″), with a little overlap for the SD card and connectors which project over the edges. It weighs 45g
[h=4]HOW POWERFUL IS IT?[/h]The GPU provides OpenGL ES 2.0, hardware-accelerated OpenVG, and 1080p30 H.264 high-profile encode and decode. The GPU is capable of 1Gpixel/s, 1.5Gtexel/s or 24 GFLOPs of general purpose compute and features a bunch of texture filtering and DMA infrastructure. This means that graphics capabilities are roughly equivalent to the original Xbox’s level of performance. Overall real world performance for models A, A+, B & B+ is something like a 300MHz Pentium 2, only with much, much swankier graphics. The Model 2B is approximately equivalent to an Athlon Thunderbird running at 1.1GHz: again, it has the much higher-quality graphics that come from using the same GPU as in previous models
[h=4]WHAT ARE THE POWER REQUIREMENTS?[/h]The device is powered by 5v micro USB. Exactly how much current (mA) the Raspberry Pi requires is dependent on what you hook up to it. We have found that purchasing a 1.2A (1200mA) power supply from a reputable retailer will provide you with ample power to run your Raspberry Pi for most applications, though you may want to get a 2.5A (2500mA) if you want to use all 4 USB ports on the Models B+/2B without using an external powered USB hub. The table below outlines the power requirements of each model.
| Product | Recommended PSU current capacity | Maximum total USB peripheral current draw | Typical bare-board active current consumption |
|---|---|---|---|
| Raspberry Pi Model B+ | 1.8A | 600mA/1.2A (switchable) | 330mA |
| Raspberry Pi 2 Model B | 1.8A | 600mA/1.2A (switchable) |
[TD]Raspberry Pi Model A+[/TD]
[TD]700mA[/TD]
[TD]500mA[/TD]
[TD]180mA[/TD]
[/TR]
The specific current requirements of each model are dependent on the use case: the PSU recommendations are based on “typical maximum” current consumption, the typical current consumption is for each board in a “desktop computer” configuration. The Raspberry Pi model A, A+, and B can supply a maximum of 500mA to downstream USB peripherals. If you wish to connect a high-power USB device then it is recommended to connect a powered USB hub to the Pi and connect your peripherals to the USB hub. The Raspberry Pi model B+ and 2B can supply 600mA/1.2A to downstream USB peripherals, switchable by a firmware setting. This allows the vast majority of USB devices to be connected directly to these models, assuming the upstream power supply has sufficient available current. Very high-current devices or devices can draw a surge current such as certain 3G modems and USB hard disks will still require an external powered USB hub. The power requirements of the Raspberry Pi increase as you make use of the various interfaces on the Raspberry Pi. The GPIO pins can draw 50mA safely (that is 50mA distributed across all the pins! An individual GPIO pin can only safely draw 16mA), the HDMI port uses 50mA, the camera module requires 250mA, and keyboards and mice can take as little as 100mA or as much as 1000mA! Check the power rating of the devices you plan to connect to the Pi and purchase a power supply accordingly. If you’re not sure, we would advise you to buy a powered hub
[h=4]WHAT OPERATING SYSTEM (OS) DOES IT USE?[/h]There are several official distributions (distros) available on our downloads page. New users will probably find the NOOBs installer the easiest to work with, as it walks you through the download and installation of a specific distro. The recommended distro is Raspbian, which is specifically designed for the Raspberry Pi and which our engineers are constantly optimising. It is, however, a straightforward process to replace the root partition on the SD card with another ARM Linux distro, so we encourage you to try out several distros to see which one you like the most. The OS is stored on the SD card
[h=4]WHAT LINUX DISTROS RUN ON THE PI?[/h]Raspbian (based on Debian), Arch Linux and Pidora run on Raspberry Pi 1 and 2. Ubuntu MATE and Ubuntu Snappy Core also run on Pi 2 only. See our downloads page for more information.
[h=4]WHAT SIZE SD CARD DO I NEED?[/h]Whether you want to use the NOOBS installer or a standalone distro image, the minimum size SD card we recommend using is 8GB. This will give you the free space you need to install additional packages or make programs of your own
[h=4]DOES THE DEVICE SUPPORT NETWORKING?[/h]The Model B, Model B+ and Model 2B versions of the device have built in 10/100 wired Ethernet. There is no Ethernet on the Model A or Model A+ versions.
Raspberry Pi Official Magazine: https://www.raspberrypi.org/magpi/
GPIO PIN OUT - credits kay shiangtao
Update ko to pag na-receive ko yung Pi 2B ko.
UPDATE: NA RECEIVE KO SIYA JAN 4, since DEC 22 Order date ko pero DEC 29 pa lang nila narecive sa 2go (5 working days sakto, tinamaan kase ng holidays kaya tumagal...
DELIVED VIA 2GO: around tanghali
RS Invoice
RASPBERRY PI 2 Model B Box:
Contents:
-Anti Static (ESD) Plastic
-Safety Paper
-Raspberry pi 2
Official Pi Power Supply Adapter
SAFETY PRECAUTIONS:
WHEN HANDLING THE BOARD:
- Hold the board on its edges only to avoid Electro Static Discharge (ESD
- DO NOT REMOVE THE BOARD ON THE ANTI STATIC PLASTIC UNTIL USING
- DO NOT EXPOSE TO WET, MOIST ENVIRONMENT
- DO NOT EXPOSE TO XENON FLASH (XENON CAMERAS IT WILL TRIGGER SHUTDOWN AND MAY CAUSEDO SD CARD CORRUPTION
- DO NOT PLACE ON CONDUCTIVE AREAS
USING THE PI:
- DO NOT UNPLUG THE POWER UNLESS THE PI IS HALTED (SHUT DOWNED
- DO NOT TOUCH OR CONDUCT THE ENTIRE BOARD AND/OR THE GPIO PORTS
Powering your Raspberry Pi
Requirements:
- TV/Monitor HDMI (recommended) or HDMI to VGA Active converter
- USB Adaptor Output 5V 3A (recommended Pi PSU 2A/2.5A)
- USB Cable
- RJ45 Ethernet Cable
- USB Wireless Adaptor (IFF NOT Pi3/3B+/0W)
- USB Mouse
- USB Keyboard
- HDMI - HDMI Full Cable
- Class 4, 6 or 10 MicroSD Card 8GB or higher
- Casing DIY or 3D printed
MY IMPROVISED PI CASING AND SERVER
1. Download the Raspbian from the Pi's official website and burn to MicroSD
2. Plugin USB Adaptor, HDMI , HDMI TV, MicroSD, RJ45
3. Pi will now boot to tty (terminal session.
4. Type in:
Code:
Username: pi
Password: raspberry
Code:
sudo apt-get update && sudo apt-get upgrade && sudo apt-get dist-upgrade6. Gawan mo ng Casing kung di ka bumili ng casing niya, lagyan mo din ng Fan at heatsink kung mag-ooverclock ka or kung napakainit sa bahay mo...
7. Happy Hacking
Raspberry Pi with RJ45, PSU, WiFi adapter local, HDD, SATA to USB chip, Ferero, 5v fan cooler
Powered on:
Share niyo mga Pi's niyo.
or kung wala pa kayo Order na!Kung ayaw niyo sa Pi dahil hindi siya 100% Free and Open Source/Open Hardware ipost niyo din ang iba pang Pi's tulad ng Odroid, Orange Pi, Banana Pi, Pine64, C.H.I.P atbp.
PS. 24/7 nakabukas to dahil ito na ang headless server ko sa bahay. Dapat proper ventilated siya at walang alikabok sa inyo.
This content is licensed under Creative Commons ShareAlike 4.0. CC BY-SA unless otherwise stated.
Credits: RaspberryPi ORG FAQ
RS Philippines
Myself
shiantao*
Symbianize
USEFUL LINKS:
pinout.xyz
Attachments
Last edited by a moderator:


")
