Now here is what i got about the camera..
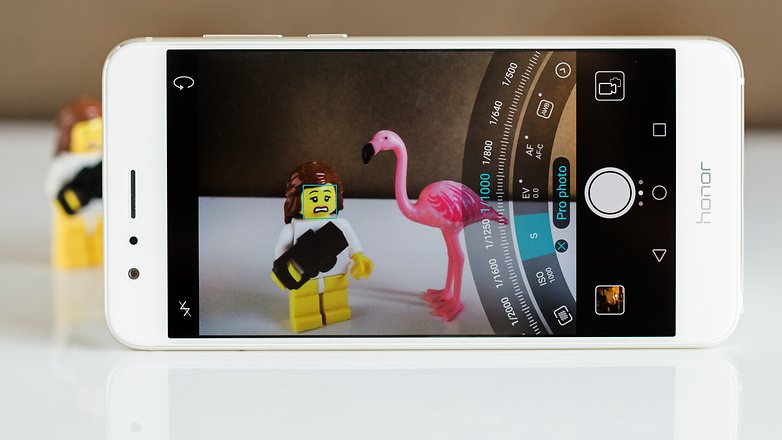
Got the chance to test the pro camera mode which allows you to fine-tune your settings as you would on a Digital SLR camera. You can adjust the exposure, for one, plus the ISO, focal point, shutter speed, exposure value, auto/manual focus, and white balance, Preview the exposure for the current scene (overexposure or underexposure) in real time. There’s a horizontal level meter that ensures your pictures are level. And there’s a helpful overlay, Camera Grid, which renders Phi and Fibonacci line patterns in the Honor 8’s viewfinder to assist in shot composition. The f/2.2 lens(es) are tack-sharp and focus instantly, buoyed by a camera app that makes capturing great photos easy.
The rear cameras can record full-HD (1920x1080) video at 60fps while the front camera records at 1080p at 30fps. The front-facing camera provides less saturated colours and more accurate images than its predecessor.

Also loving the aperture mode which allows you to set an aperture from f/0.95 to f/16 when taking a photo. Wide aperture mode lets you lets you create bokeh and depth-of-field effects. It also can redefine the focus even after you’ve taken your shot. To take the best image using this effect, make sure your phone is held as still as possible. Touch to focus on the object that you want to stand out then take your photo. After taking your photo, you can adjust the point of focus by selecting another part of the photo. When adjusting your background blur, blur it only to the point where it doesn’t overlap the edges of the object in focus. This will result in the most realistic look.


Got the chance to test the pro camera mode which allows you to fine-tune your settings as you would on a Digital SLR camera. You can adjust the exposure, for one, plus the ISO, focal point, shutter speed, exposure value, auto/manual focus, and white balance, Preview the exposure for the current scene (overexposure or underexposure) in real time. There’s a horizontal level meter that ensures your pictures are level. And there’s a helpful overlay, Camera Grid, which renders Phi and Fibonacci line patterns in the Honor 8’s viewfinder to assist in shot composition. The f/2.2 lens(es) are tack-sharp and focus instantly, buoyed by a camera app that makes capturing great photos easy.
The rear cameras can record full-HD (1920x1080) video at 60fps while the front camera records at 1080p at 30fps. The front-facing camera provides less saturated colours and more accurate images than its predecessor.
Also loving the aperture mode which allows you to set an aperture from f/0.95 to f/16 when taking a photo. Wide aperture mode lets you lets you create bokeh and depth-of-field effects. It also can redefine the focus even after you’ve taken your shot. To take the best image using this effect, make sure your phone is held as still as possible. Touch to focus on the object that you want to stand out then take your photo. After taking your photo, you can adjust the point of focus by selecting another part of the photo. When adjusting your background blur, blur it only to the point where it doesn’t overlap the edges of the object in focus. This will result in the most realistic look.