- Messages
- 93
- Reaction score
- 0
- Points
- 26
View attachment 185181
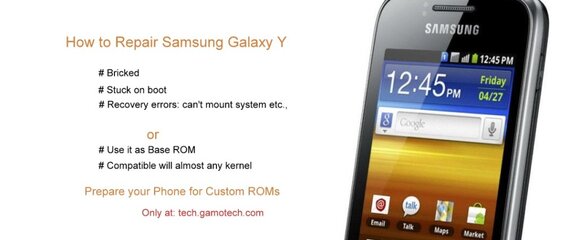
After long time of research and hard work, we’ve finally came with perfect solution to repair Samsung Galaxy Y with DDLK2 stock firmware. This is not only about to repair bricked Samsung Galaxy Y but it also work with many problems such as, phone stuck at Samsung Logo while booting, it restarting automatically, applications are crashing anytime, recovery problems such “can’t mount system”, “can’t mount cache” and “can’t mount data” and also it act as base ROM for your device too.
It also works, if you’ve installed any custom ROM on Galaxy Y but it doesn’t work which it was supposed to then you can first install this ROM and then flash the any Custom ROM, it works with any ROM. Also, it work with any other kernels. This firmware is stock, so it won’t be voiding your device warranty any more.
The complete procedure is very simple to understand and follow, we will use Odin to install this firmware on Galaxy Y. I is recommended that you follow the guide very carefully. Before going any further, read all the pre-requisites very carefully and make sure you device is fully follow them.
The complete procedure is very simple to understand and follow, we will use Odin to install this firmware on Galaxy Y. I is recommended that you follow the guide very carefully. Before going any further, read all the pre-requisites very carefully and make sure you device is fully follow them.
Pre-requisites
This DDLK2 stock firmware is only for Samsung Galaxy Y GT-S5360 and meant nothing for any other model. So make sure to check your model of your device under “About Phone” section.
Save your all data which is saved on Phone’s memory to safe place. The process will erase device memory completely.
Enable USB debugging, go to settings -> application -> development -> then check the USB debugging box. Make sure your phone have at least 50% charging. It is necessary that your phone should be charged to good extent.
Make sure your phone is detected by PC, if not then install USB drivers first or simply install Samsung Kies. You can download it from Samsung official site.
Downloads
Download DDLK2 Stock firmware for Galaxy Y here or here (S5360_DDLK2_ODDLK1_DDLK1_wipe_by_SplitFUS2.zip) and extract it on your PC. There are three files under this zip file,
1. CSC_S5360_ODDLK1.tar.md5
2. MODEM_S5360_DDLK1.tar.md5
3. PDA_S5360_DDLK2.tar.md5
Remember these files and they will be used in further steps.
Download Odin3-v3.07 program here (Odin3-v3.07.zip) and extract it to your PC. Look for the “Odin3 v3.07.exe” and remember that.
How to repair bricked Galaxy Y or How to prepare Galaxy Y for custom ROMs
Firstly, Turn off the device and wait for 5-7 seconds.
Now press and hold Volume Down + Home + Power button at same time until a Warning! message appears on screen. Then press Volume Up to proceed to download mode. Now’ll be at download mode of Samsung Galaxy Y.
Now look for “Odin3 v3.07.exe”, and run it on your PC.
Connect your phone to PC using USB cable and look on Odin program, the ID:Com section will turn to light blue or green. That means your devices has been detected successfully. If in case you didn’t see any changes over Odin then, first install USB drivers and then again connect your device.
Now under Odin program, select and locate followings
Select “PDA” and then find and locate “PDA_S5360_DDLK2.tar.md5″ from the extracted zip file.
Select “Phone” and then find and locate “MODEM_S5360_DDLK1.tar.md5″.
Select “CSC” and then find and locate “CSC_S5360_ODDLK1.tar.md5″
After it, make sure that “Re-Partition” box is unchecked and don’t make any changes to settings.
Now, click on “Start” button and wait until Odin finishes the job.
On successful installation, Pass message will appear on Odin and you’re phone will be rebooting itself. Now you can unplug your device from PC.
So you have own managed to repair your bricked Galaxy Y. Or you can say, now you are ready to install any custom ROM to your Phone without having to face any bugs or issues after installing that particular Custom ROM.
After installing this stock firmware you’ll be ready to install very beutiful ROM such as iphone ROM and Android 4.3 Jelly Bean on Galaxy Y.
i Hope nakatulong po ako to all of those newbies")
")
After long time of research and hard work, we’ve finally came with perfect solution to repair Samsung Galaxy Y with DDLK2 stock firmware. This is not only about to repair bricked Samsung Galaxy Y but it also work with many problems such as, phone stuck at Samsung Logo while booting, it restarting automatically, applications are crashing anytime, recovery problems such “can’t mount system”, “can’t mount cache” and “can’t mount data” and also it act as base ROM for your device too.
It also works, if you’ve installed any custom ROM on Galaxy Y but it doesn’t work which it was supposed to then you can first install this ROM and then flash the any Custom ROM, it works with any ROM. Also, it work with any other kernels. This firmware is stock, so it won’t be voiding your device warranty any more.
The complete procedure is very simple to understand and follow, we will use Odin to install this firmware on Galaxy Y. I is recommended that you follow the guide very carefully. Before going any further, read all the pre-requisites very carefully and make sure you device is fully follow them.
The complete procedure is very simple to understand and follow, we will use Odin to install this firmware on Galaxy Y. I is recommended that you follow the guide very carefully. Before going any further, read all the pre-requisites very carefully and make sure you device is fully follow them.
Pre-requisites
This DDLK2 stock firmware is only for Samsung Galaxy Y GT-S5360 and meant nothing for any other model. So make sure to check your model of your device under “About Phone” section.
Save your all data which is saved on Phone’s memory to safe place. The process will erase device memory completely.
Enable USB debugging, go to settings -> application -> development -> then check the USB debugging box. Make sure your phone have at least 50% charging. It is necessary that your phone should be charged to good extent.
Make sure your phone is detected by PC, if not then install USB drivers first or simply install Samsung Kies. You can download it from Samsung official site.
Downloads
Download DDLK2 Stock firmware for Galaxy Y here or here (S5360_DDLK2_ODDLK1_DDLK1_wipe_by_SplitFUS2.zip) and extract it on your PC. There are three files under this zip file,
1. CSC_S5360_ODDLK1.tar.md5
2. MODEM_S5360_DDLK1.tar.md5
3. PDA_S5360_DDLK2.tar.md5
Remember these files and they will be used in further steps.
Download Odin3-v3.07 program here (Odin3-v3.07.zip) and extract it to your PC. Look for the “Odin3 v3.07.exe” and remember that.
How to repair bricked Galaxy Y or How to prepare Galaxy Y for custom ROMs
Firstly, Turn off the device and wait for 5-7 seconds.
Now press and hold Volume Down + Home + Power button at same time until a Warning! message appears on screen. Then press Volume Up to proceed to download mode. Now’ll be at download mode of Samsung Galaxy Y.
Now look for “Odin3 v3.07.exe”, and run it on your PC.
Connect your phone to PC using USB cable and look on Odin program, the ID:Com section will turn to light blue or green. That means your devices has been detected successfully. If in case you didn’t see any changes over Odin then, first install USB drivers and then again connect your device.
Now under Odin program, select and locate followings
Select “PDA” and then find and locate “PDA_S5360_DDLK2.tar.md5″ from the extracted zip file.
Select “Phone” and then find and locate “MODEM_S5360_DDLK1.tar.md5″.
Select “CSC” and then find and locate “CSC_S5360_ODDLK1.tar.md5″
After it, make sure that “Re-Partition” box is unchecked and don’t make any changes to settings.
Now, click on “Start” button and wait until Odin finishes the job.
On successful installation, Pass message will appear on Odin and you’re phone will be rebooting itself. Now you can unplug your device from PC.
So you have own managed to repair your bricked Galaxy Y. Or you can say, now you are ready to install any custom ROM to your Phone without having to face any bugs or issues after installing that particular Custom ROM.
After installing this stock firmware you’ll be ready to install very beutiful ROM such as iphone ROM and Android 4.3 Jelly Bean on Galaxy Y.
i Hope nakatulong po ako to all of those newbies