Symbianize Forum

Most of our features and services are available only to members, so we encourage you to login or register a new account. Registration is free, fast and simple. You only need to provide a valid email. Being a member you'll gain access to all member forums and features, post a message to ask question or provide answer, and share or find resources related to mobile phones, tablets, computers, game consoles, and multimedia.

All that and more, so what are you waiting for, click the register button and join us now! Ito ang website na ginawa ng pinoy para sa pinoy!

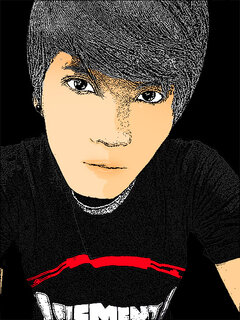
Tutorial - Cartoonize your photo using photoshop [Updated]

Pa subscribe TS!.. tagal ko na hinahanap kung pano gumawa ng ganto!..
 
TS salamat dito. kasi yung akin hindi ko ma-drag or mailipat dun sa blank page. pag-dinadrag ko hindi sumasama yung picture. naiiba lang ng kulay yung gradiant na ginawa ko sa
 
attachment.php


e2 ung hinahanap hanap ko .... nice1 ts


nagawa ko rin :clap:
 

Attachments

  • jigzcartoor.jpg
    jigzcartoor.jpg
    183.5 KB · Views: 76
bro btw :salute: thanks ng marami kakatuwa one more thing may problema ako sa step mo na to:


kase kapag nilipat ko yung cartoonize image ko dun sa kabilang blank ang nangyayare yung color lang nasasama di ko magawa yung mismo nasa tut mo?

di ko sya ma move ng lahat pa turo panu thanks!

bro senxa na medjo late reply, btw thanks din sa pag-appreciate :)

ah, need mo i-merge muna ung mga layers para maging 'flat' at iisang sheet lang kumbaga if your doing a cartoon animation.

anyway, asa Layers menu un den click either merge visible or flatten image. :)
 
TS salamat dito. kasi yung akin hindi ko ma-drag or mailipat dun sa blank page. pag-dinadrag ko hindi sumasama yung picture. naiiba lang ng kulay yung gradiant na ginawa ko sa

bro, similar issue din pala na na-stuck sa step na yan :) thanks din nga pala pag appreciate nitong tut :)

paki-follow din ng namention ko earlier, yung i-merge muna yung mga layers para maging 'flat' then chaka natin 'i-patong' (ctrl-a, ctrl-c, ctrl-v) sa gradient layer.

oo nga pal, do take yung pagkakasunod-sunod ng layers, ang hierarchy, yung top-most layer (bottom-to-top sa layer window pane , kadalasan asa kanan, unless na-customize nyo na working space ng PS nyo), yung top-most, xa ang mas magiging visible, kaya take note din ito. :)
 
The real and cool cartoon is on my signature. wanna get the TUT?
 
salamat sa tutorial TS. kakaenjoy ska easy to follow yung tut mo. hehe
 
hillow,,, sorry Beginner po.

nahirapan ako sundan,

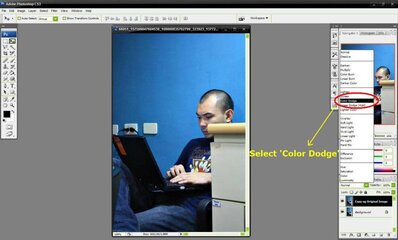
di ko ma hanap panu gawin ang "color dodge". di ko xa mahanap :(
 
HILLOW PLEASE HELP ME, SAN PO ITO MAHAHANAP?
STEP BY STEP PO PLEASE BEGINNER LANG Ako,

attachment.php


Attachments

  • 04.jpg
    04.jpg
    42.4 KB · Views: 71
Back
Top Bottom