- Messages
- 21
- Reaction score
- 0
- Points
- 26
Hey fellas. I just recently broke my Android phone. I'm out of a job and so I can't have the serious damage repaired just yet.
But I have a laptop, so I did some googling and thankfully, I found out that installing Android on a Laptop is even easier than Rooting an android phone itself.
Yep, you read that right, mga kasymb.
So if you have a situation just like mine, or if you're just a playful digital daredevil, do me a favor and read on.
I'll post some screenies for ya later on, I'm actually using the laptop running on android 4.4.2 Kitkat to write this post.
I've done an initial benchmark and the thing is rigt on top, even mightier than the Note 4! Well, no surprise in that di ba kasi laptop nga naman ang gamit ko.
Now the where the excitement really comes from is to think what I could do with this if I have a Touchscreen Lenovo notebook running windows, right?
We all know the android gaming experience on tablets especially for touch screen games beats a lot of devices and in my opinion, if you're a mobile game enthusiast, you're better off with android. So if you own a touch screen notebook, that doubles as a tablet, wow, you have the best of both worlds, am I right?
Sorry for the blabbering and... Let's do this!!!
I. First, let's talk about what you'll need.
1. Any Desktop, Laptop, or Netbook running Windows.
(I'm using a Laptop with Windows 7 installed so the troubleshoot may require some skills on your part if you have a different system. But if you have experience in installing OSes, you'll be fine.)
2. A USB flash drive - at least 4 GB. The ISO file will only be around 500MB but to be sure there will be no problems, just use a 4GB.
3. The ISO file. Download it here: Android 4.4 x86
(if you're not sure which one to download, just pick the one with the latest date under where it says Android-x86-4.4. Take note: download the one that says .ISO)
(or if you want the one I'm using: you can also click here
4. You'll also need Rufus. Download it here: Rufus
(This is a program that you need to burn the ISO image into the USB flash Drive. More on this later. right now, install mo lang muna.
5. Kelangan mo rin ng: Partition Wizard. Extract, Download mo to at install.
for now, just download away and relax.
II. Okay, so at this point I assume you'r download is finished, so let's do the tricky part. The procedure of course.
If you're not very tech savvy, at nag-aalala ka na baka masira mo laptop mo, just perform a backup first. Or you can create a restore point. If you're confident enough, just skip that.
Now for the main steps.
1. a. First let's create a partition na magiging internal storage ng bago mong Tablet/Laptop.
Punta ka sa ininstall mong Partition Wizard kanina. Kung isa lang ang partition mo, ok lang yan, ang importante, may over 50GB kang space.
b. Click mo yung Drive na gusto mo tapos choose resize mula sa mga options sa left.
c. Move mo lang yung scroll bar para maadjust mo sa gusto mong size. Ang habol natin dito, yung unallocated space, para maging pag-aari sya ng Andrid mo. 16GB is ok. pero kung malaki hard drive space mo, gawin mong 32 GB.
d. Kung napansin mo, gumawa sya ng unallocated space ayon sa size na pinili mo. Right click mo yung unallocated space at click create, then from the options pick ext 3.
e. Click APPLY dun sa options sa upper left. Kung wala kang ibang nakaopen na program, gagawin nya yung tasks without restarting pero kung heavy usage ang HDD mo, magboboot PC mo. Ok lang yan, just let it finish. It may take around 10 minutes depending on your system speed.
magrerestart din sya mag isa. Hindi ka magkaka error dito sa point na to basta walang hidden probs ang PC mo.
2. After magboot ng PC mo, ready ka na para sa next step. Given na hindi corrupted yung dinownload mong ISO, you're ready for the next step.
We're halfway through. Sisiw diba?
Dito na natin ibu-burn yung ISO image file sa USB.
a. Insert your USB Flash drive
b. Launch Rufus. Pagkalaunch mo, automatic na nyang inaname yung Drive.
c. Sa Format options, select Quick format.
d. Where it says 'Create a Bootable disk' naman, select ISO image.
e. Sa tabi nun, click the CD icon, then select the ISO you downloaded. Click mo din yung last na checkbox. Click start.
that may take a few minutes as well. Relax ka muna. Pag tapos na, go to step 3.
3. This is the part where you have to be extra careful. Dito na natin iinstall sa Laptop ang android.
a. Restart your PC.
b. While it's booting up, go to your BIOS menu (press F2 or DEL).
c. In your BIOS screen, go to BOOT, set your USB drive as the First Boot device.
d. Press F10 or save and exit, then restart again.
e. Now it will show you the Boot IMG of the Android installer na binurn natin sa USB. Select the LAST option, the one that says, INSTALLATION.
f. Sa next prompt papipiliin ka nya ng Partition. select mo yung ni-Create mo kanina. Tapos select EXT3 sa file system.
g. tatanungin ka nya ng: Install Bootloader GRUB? just choose YES
h. install a Boot Image for Windows? YES din yan.
i. Sa next prompt: INSTALLING ANDROID X86 - hintayin mo na lang matapos. Medyo matagal dito, mga 10 minutes.
j. Last step: papipiliin ka nya kung Run android na ba, o restart muna. Restart muna. Alisin mo na rin yung flash drive mo.
Mejo matagal yung first boot. Pero typical naman yan sa mga bagong android device. Sign in using your Google account.
NOTE: pag ayaw kumonek, skip mo muna yung sign in. tapos setup mo yung Wifi. Pag wala pa ring internet connection, punta ka sa apps mo.
Launch mo yung Developer tools. punta ka sa Connectivity. Enable, Disable, Enable WIFI. then go Back to drawer.
Tapos punta ka naman sa Settings ng Android, connect to WiFi ulet.
Try mo punta ng Play Store. It should work now.
May mga shortcuts din sa keyboard dito
Kung accidentally na portrait yung screen mo, double tap F9 lang babalik yan sa dati.
Enjoy!
Pasensya na naubusan ako ng English.")
Note2: Di ko pa nafifigure out kung pano lagyan ng sim. please post in the comments if you by chance find out.
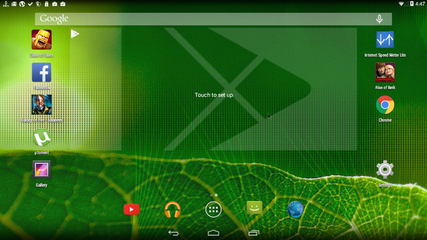
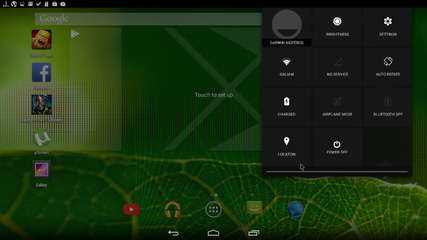
Screenies:
View attachment 207730
View attachment 207734
View attachment 207732
But I have a laptop, so I did some googling and thankfully, I found out that installing Android on a Laptop is even easier than Rooting an android phone itself.
Yep, you read that right, mga kasymb.
So if you have a situation just like mine, or if you're just a playful digital daredevil, do me a favor and read on.
I'll post some screenies for ya later on, I'm actually using the laptop running on android 4.4.2 Kitkat to write this post.
I've done an initial benchmark and the thing is rigt on top, even mightier than the Note 4! Well, no surprise in that di ba kasi laptop nga naman ang gamit ko.
Now the where the excitement really comes from is to think what I could do with this if I have a Touchscreen Lenovo notebook running windows, right?
We all know the android gaming experience on tablets especially for touch screen games beats a lot of devices and in my opinion, if you're a mobile game enthusiast, you're better off with android. So if you own a touch screen notebook, that doubles as a tablet, wow, you have the best of both worlds, am I right?
Sorry for the blabbering and... Let's do this!!!
I. First, let's talk about what you'll need.
1. Any Desktop, Laptop, or Netbook running Windows.
(I'm using a Laptop with Windows 7 installed so the troubleshoot may require some skills on your part if you have a different system. But if you have experience in installing OSes, you'll be fine.)
2. A USB flash drive - at least 4 GB. The ISO file will only be around 500MB but to be sure there will be no problems, just use a 4GB.
3. The ISO file. Download it here: Android 4.4 x86
(if you're not sure which one to download, just pick the one with the latest date under where it says Android-x86-4.4. Take note: download the one that says .ISO)
(or if you want the one I'm using: you can also click here
4. You'll also need Rufus. Download it here: Rufus
(This is a program that you need to burn the ISO image into the USB flash Drive. More on this later. right now, install mo lang muna.
5. Kelangan mo rin ng: Partition Wizard. Extract, Download mo to at install.
for now, just download away and relax.
II. Okay, so at this point I assume you'r download is finished, so let's do the tricky part. The procedure of course.
If you're not very tech savvy, at nag-aalala ka na baka masira mo laptop mo, just perform a backup first. Or you can create a restore point. If you're confident enough, just skip that.
Now for the main steps.
1. a. First let's create a partition na magiging internal storage ng bago mong Tablet/Laptop.
Punta ka sa ininstall mong Partition Wizard kanina. Kung isa lang ang partition mo, ok lang yan, ang importante, may over 50GB kang space.
b. Click mo yung Drive na gusto mo tapos choose resize mula sa mga options sa left.
c. Move mo lang yung scroll bar para maadjust mo sa gusto mong size. Ang habol natin dito, yung unallocated space, para maging pag-aari sya ng Andrid mo. 16GB is ok. pero kung malaki hard drive space mo, gawin mong 32 GB.
d. Kung napansin mo, gumawa sya ng unallocated space ayon sa size na pinili mo. Right click mo yung unallocated space at click create, then from the options pick ext 3.
e. Click APPLY dun sa options sa upper left. Kung wala kang ibang nakaopen na program, gagawin nya yung tasks without restarting pero kung heavy usage ang HDD mo, magboboot PC mo. Ok lang yan, just let it finish. It may take around 10 minutes depending on your system speed.
magrerestart din sya mag isa. Hindi ka magkaka error dito sa point na to basta walang hidden probs ang PC mo.
2. After magboot ng PC mo, ready ka na para sa next step. Given na hindi corrupted yung dinownload mong ISO, you're ready for the next step.
We're halfway through. Sisiw diba?
Dito na natin ibu-burn yung ISO image file sa USB.
a. Insert your USB Flash drive
b. Launch Rufus. Pagkalaunch mo, automatic na nyang inaname yung Drive.
c. Sa Format options, select Quick format.
d. Where it says 'Create a Bootable disk' naman, select ISO image.
e. Sa tabi nun, click the CD icon, then select the ISO you downloaded. Click mo din yung last na checkbox. Click start.
that may take a few minutes as well. Relax ka muna. Pag tapos na, go to step 3.
3. This is the part where you have to be extra careful. Dito na natin iinstall sa Laptop ang android.
a. Restart your PC.
b. While it's booting up, go to your BIOS menu (press F2 or DEL).
c. In your BIOS screen, go to BOOT, set your USB drive as the First Boot device.
d. Press F10 or save and exit, then restart again.
e. Now it will show you the Boot IMG of the Android installer na binurn natin sa USB. Select the LAST option, the one that says, INSTALLATION.
f. Sa next prompt papipiliin ka nya ng Partition. select mo yung ni-Create mo kanina. Tapos select EXT3 sa file system.
g. tatanungin ka nya ng: Install Bootloader GRUB? just choose YES
h. install a Boot Image for Windows? YES din yan.
i. Sa next prompt: INSTALLING ANDROID X86 - hintayin mo na lang matapos. Medyo matagal dito, mga 10 minutes.
j. Last step: papipiliin ka nya kung Run android na ba, o restart muna. Restart muna. Alisin mo na rin yung flash drive mo.
Mejo matagal yung first boot. Pero typical naman yan sa mga bagong android device. Sign in using your Google account.
NOTE: pag ayaw kumonek, skip mo muna yung sign in. tapos setup mo yung Wifi. Pag wala pa ring internet connection, punta ka sa apps mo.
Launch mo yung Developer tools. punta ka sa Connectivity. Enable, Disable, Enable WIFI. then go Back to drawer.
Tapos punta ka naman sa Settings ng Android, connect to WiFi ulet.
Try mo punta ng Play Store. It should work now.
May mga shortcuts din sa keyboard dito
Kung accidentally na portrait yung screen mo, double tap F9 lang babalik yan sa dati.
Enjoy!
Pasensya na naubusan ako ng English.
Note2: Di ko pa nafifigure out kung pano lagyan ng sim. please post in the comments if you by chance find out.
Screenies:
View attachment 207730
View attachment 207734
View attachment 207732

 try ko to sa isang client pc ko subukan ko na rin kung pede kahit wired lan wala kasi ko wifi adapter feedback ako after matest to


