- Messages
- 101
- Reaction score
- 0
- Points
- 26
The First Zenfone 2 Thread for Rooting, Customization and Troubleshooting.
ASUS ZENFONE 2 ZE551ML/ZE550ML OFFICIAL THREAD
ASUS ZENFONE 2 ZE551ML/ZE550ML OFFICIAL THREAD
Contents:
1.) Specifications
2.) Repair/Revive/Unbrick Deadboot/Bricked/Bootloop
3.) Root Guide / Custom Recovery TWRP / Bootloader Unlocker
4.) Custom ROM Installation
1.) SPECIFICATIONS
View attachment 321266
-----------------------------------------------------------------------------------------------------------------------------------------------
2.) Repair/Revive/Unbrick Deadboot/Bricked/Bootloop
Para sa mga nasiraan ng Zenfone 2 or gusto na iformat dahil sa napakabagal or virus infected na phone or bricked eto ang solusyon.
REMINDERS:
• This is for Zenfone 2 ZE551ML/ZE550ML Models DO NOT TRY TO OTHER MODELS!
[DEADBOOT/UNBRICK/BOOTLOOP TUTORIAL]
(Credits to XDA: Summit007s URL: https://forum.xda-developers.com/zenfone2/general/guide-brick-soft-hard-bricked-zenfone-2-t3284256)
Step 1: Install the driver and connect mode IntelSocUSB IntelSoc
-This Is the driver help with a computer connected to your Zen2 IntelSoc mode as mentioned above. Because of this special driver, on some machines running windows 8 / 8.1 / 10 you can not install the normal way is that to add a little more tricks, not too hard, I'll complete list Under.
1.1 - Install IntelSocUSB
-First, Please disconnect the machine Zenfone your 2.
-Download Driver IntelSocUSB here:
http://drive.google.com/file/d/0B2oM...ew?usp=sharing
If you're using Windows 7:
Right-click the file -Click iSocUSB-Driver-Setup-1.2.0 choose "Run as Administrator".
-Make The installation steps as usual until you see a small window "Windows Security" requires authentication settings then click on the "install this driver software anyway"
-After This step, the driver installation is finished, continue to section 1.2 for connecting IntelSoc regime.
If you're using Windows 8 / 8.1:
-On Keyboard press Windows + I to show charm bar bar in the right corner, click on the item setting.
Choose "Change PC Settings" to enter the PC Settings.
Choose the General tab and navigate to Advanced Startup section, continue click Restart now.
This force will reboot windows and allows you access to the advanced mode, in turn selected the following items: Troubleshoot - -Startup Settings Advanced Options and then click the Restart button to restart the computer.
-Continue Press 7 on the keypad to access the installation mode allows drivers.
Right-click the file -Click iSocUSB-Driver-Setup-1.2.0 choose "Run as Administrator".
-Make The installation steps as usual until you see a small window "Windows Security" requires authentication settings then click on the "install this driver software anyway"
-After This step, the driver installation is finished, continue to section 1.2 for connecting IntelSoc regime.
If you're using Windows 10:
-On Keyboard press Windows + I or click Start, select Settings.
-In The Settings window, select the Update & security.
-Continue Choose recovery and click "Restart now".
-When The computer has access to the Advanced screen, how similar startup with Windows 8 above.
-After This step, the driver installation is finished, continue to section 1.2 for connecting IntelSoc regime.
1.2 Connect with computer IntelSoc Zenfone 2:
After driver installation step above 1.1 as successful you are in a window like this, do not click Next yet. Now you must complete step IntelSoc connection before installing xfstk downloader.
-The Device manager: right-click the Computer icon, select Manager, find the device manager.
-In Device manager, to IntelSOC, click the down side, you only see the present only one item is Intel SoC driver.
Ash back to the Zenfone 2, shutdown, press simultaneously the key "source" + "volume +", of course you will see a screen hanging cables.
-Connect to your computer via USB cable, to standard Intel SOC driver position, wait a few seconds if the current add an item immediately below another MOOREFIELD new devices is successful.
-If You have not been, the test performed as follows: turn off the machine, plug the cable into the computer, press the power button until the device vibrates slightly, then release.
-This Is a required step to complete before performing next.
Ash back window IntelSOC earlier installation, click Next and Finish.
1.3 Installing xfstk-downloader:
Download xFSTK Downloader v1.7 here:
http://drive.google.com/file/d/0B2oM...ew?usp=sharing
-Download And install with a setup similar to IntelSoc Driver guided above is, simple installation process does deserve to be noted.
-That's It step 1.
Step 2: Use the Downloader to reload the bootloader xFSTK
This is a tool to support the new bootloader loaded into memory chip straight soc IntelSoc mode.
XFSTK load Downloader v1.7:
http://drive.google.com/file/d/0B2oM...ew?usp=sharing
-The Necessary files:
ZE551ML: http://drive.google.com/file/d/0B2oM... Usp = sharing
ZE550ML: http://drive.google.com/file/d/0B2oM... Usp = sharing
After downloading the necessary files extract to a separate folder 3 file dnx_fwr.bin, ifwi.bin, bootloader.
-Open XFSTK Downloader, first passed MRD tab A0 / B0 + A0 + CRC as shown Moor.
-Then Go to Options to change the value in the Value section Override Flag GP 0x800000807. Click OK is complete initial preparation.
This force remains connected to the phone cable.
Begin the process of loading the bootloader:
+ First in turn selected item Firmware FW 2 cells and IFWI DNX 2 dnx_fwr.bin and ifwi.bin file.
+ Section IFWI: skip the first box, in the box looking to file droidboot_dnx.img.POS_sign.bin Image OS, here is our bootloader files.
Now let's go to the Device Status section below, this section shows the number of connected IntelSoc, you need at least one device is connected. If in step 1 you do succeed, make sure xFSTK Downloader also get equipment, if not retry the connection cable.
Just click on the download button to start Begin implementation.
-Here You may see error faild continuity however kept calm to software performance. Until now informed SUCCESS as shown below, then congratulate you, our problem is almost solved.
The process is loaded bootloader successful restart when you will not see another familiar ASUS screen but instead is a 4 color, just like some TV stations stop broadcasting on TV.
Shortcuts in bootloader test can not yet see. Now you can load the ROM via fastboot mode / droidboot and know.
-If Not know how to do this, see step 4. If the flash ROM or flash via fastboot not finished still not on the operating system, your computer would be heavier than normal, continue to step 3.
-Note: Hanging cable phenomenon will appear again if you are not successful flash ROM. Each drawing shows the cable hanging out, you need to perform this step 2.
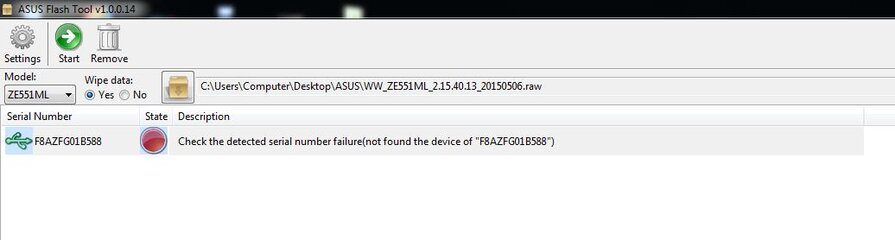
Step 3 (if applicable): Using ASUS FlashTool reloaded raw files.
Here's how to load ROM via fastboot mode is considered as the most supportive.
Download ASUS FlashTool 1.0.0.14: the previous version can not support Zenfone 2.
https://drive.google.com/open?id=0B4...m5RWTFydXZWOTQ
Download firmware for ZE551ML 2.20.40.194 raw format here:
https://drive.google.com/file/d/0B0v...lTOExIekU/view
Version for ZE550ML 2.20.40.155 raw format here: https://yadi.sk/d/XAUyR8eRtuKdA
Installing ASUS FlashTool resembles IntelSoc describes how to install the above, you also need to fully implement the steps before the installation on your Windows 7.8.10 will not repeat again.
-To Phone droidboot mode / fastboot, connected computer, enable ASUS FlashTool.
ASUS FlashTool -On screen, in the model of your selected device (ZE551ML / ZE550ML). Part wipe data option. Click the button next to wipe data section to find raw files downloaded above.
Below current frame connected devices, if not try to wait for a few minutes, plug in the cord, if not you are required to reinstall the driver IntelUSB (this does not lead his popularity and link again).
-Click Select your device and press the Start button to begin implementation.
Firmware loading process long-range 5 to 10 minutes. Then the machine will automatically boot into the operating system, if successful, congratulations to you.
Note: It is possible at this stage you will not succeed with the process of loading raw files, the software itself runs completely without any notice. If this process occurs too 30p then your job is forced to withdraw cable.
-Mark Whether the file import process may not succeed but at least Flash Tool ASUS sent commands resize partitions, if the command is successful, then the partition on the device has been fixed and you was able to load the ROM type fastboot okay, do the next step 4 preview successful offline.
Step 4: Use a rechargeable Fastboot img file.
The last pitch to bring life back to the two of you here Zenfone.
-There Bootloader means you can use fastboot to flash ROM img format already.
Img -Download the latest ROM for Zenfone 2 here:
-Choose The appropriate ROM version (ZE551ML / ZE550ML) and download all the files in that directory, links to download: http://mega.nz/#F! K4MHiAgL! DVuOKeH...9ffw! Xwc0BJrY
-Use Manager winrar or any unzip the archive file will be system.img system.zip
-Copy Boot.img, droidboot.img, recovery.img, system.img in the folder C: \ adb adb install directory or your.
-file SplashImage here:
fshare.vn/file/2KIL3GQ1NZN2
General similarity copied to the folder with the other files.
Open ADB made the following statement:
Code:
Code:
fastboot flash splashimage splashimage.img
fastboot fastboot flash droidboot.img
fastboot flash boot boot.img
fastboot flash recovery recovery.img
fastboot flash system system.img
fastboot reboot
[FORMAT/FACTORY RESET TUTORIAL]
FOR STOCK RECOVERY (What is Stock Recovery? -It is the default recovery of the device, meaning no custom recovery has been installed yet)
• Turn your Zenfone 2 OFF
• Hold POWER + VOLUME UP (If the Asus Logo Appears then release it)
• By pressing VOLUME DOWN you will choose fastboot modes between (NORMAL, RECOVERY, REBOOT) - just keep on pressing VOL DOWN until you get to the RECOVERY Option
• By pressing POWER your device will enter the Recovery Mode
• You may notice that the Android Logo appears steady - press Volume Up + Power for 6 Seconds then release it
• Now you have Options appeared - By pressing volume down - Select Wipe Data/Factory Reset
• Now press POWER to ENTER your selected choice
• Wait for it to finish then Select Reboot
• First start may take a while since it is freshly reformatted!
Congratulations!
FOR CUSTOM RECOVERY [TWRP/CWM]
• Turn your Zenfone 2 OFF
• Hold POWER + VOLUME UP (If the Asus Logo Appears then release it)
• By pressing VOLUME DOWN you will choose fastboot modes between (NORMAL, RECOVERY, REBOOT) - just keep on pressing VOL DOWN until you get to the RECOVERY Option
• By pressing POWER your device will enter the Recovery Mode
• You will now be redirected to the Custom Recovery Page
If you have TWRP then TOUCH SCREEN is enabled - meaning to perform actions you need to touch options
• Tap on Wipe - Then SWIPE on the slider that says "Wipe Data/Factory Reset"
• After that Reboot - System
If you have CWM then the controls are like the stock Recovery
• Now you have Options appeared - By pressing volume down - Select Wipe Data/Factory Reset
• Now press POWER to ENTER your selected choice
• Wait for it to finish then Select Reboot
• First start may take a while since it is freshly reformatted!
Congratulations!
-----------------------------------------------------------------------------------------------------------------------------------------------
3.) ROOT GUIDE/ BOOTLOADER UNLOCKER
Please follow the steps accordingly, do not skip one which hasn't been done yet.
Advantages of Rooting:
• Customizes the System
• Controls Hardware preferences which may result in Speeding Up or even getting a Battery Conservation
• Can install custom rom
• Bypass the factory limitations in the device
Disadvantages of Rooting:
• May Void warranty (If you bring it back for replacement but you forgot to UNROOT)
• If you are clumsy and do not have enough common sense to control your device, you may get Bootloops, Deadboots and other things alike.
HOW TO ROOT INSTALL TWRP UNLOCK BOOTLOADER:
IN ORDER TO ROOT YOU NEED TWRP, IN ORDER TO INSTALL TWRP YOU NEED TO UNLOCK BOOTLOADER
SO PLEASE FOLLOW THESE STEPS ACCORDINGLY!
FIRST -> To Unlock Bootloader
1.) Install Bootloader Unlocker First: http://www.mediafire.com/file/ci5wssotnj2fu9z/UnlockApp_ze551ml_20150723.apk
2.) Install the Unlock Device Tool APK and OPEN
3.) Read all of the Statements there and Proceed with Unlocking by Tapping "Agree: checkbox and Tapping on the Lock Icon
4.) It will ask you for your PIN/PASSWORD - so Enter it and proceed
5.) Your device will reboot - It will boot to the fastboot first then wait until it reboots again, DO NOT DO ANYTHING Until it boots to the system again- and if the Boot Logo Background became white - it means it is already Unlocked!
SECOND -> To Install TWRP
1.) Download ADB Drivers: https://goo.gl/uFBbHk
2.) Download TWRP: https://dl.twrp.me/Z00A/twrp-3.0.0-0-Z00A.img
3.) Extract the ADB Drivers to a Folder and Install ADB Drivers (A blue window will appear - asking for a confirmation - just type Y for anything it asks)
4.) Enable Debugging Mode on your device by going to Settings - Developer Options - Debugging Mode
(No Developer Options are listed? -Go to Settings - About Phone - Tap on Build Number quickly for 7x to enable developer options)
5.) Connect your device to your PC
6.) Copy the twrp-3.0.0-0-Z00A.img you have downloaded earlier to a folder
7.) Open that folder - Shift + Right click to the background and Select "Open Command Window Here"
8.) Type "adb devices" (without quoation marks)
9.) If you see "*daemon started successfully" then your ADB Devices are installed - if you see your device listed there it means you are connected
10.) Look at your phone and a window will appear - just tap "ALLOW"
11.) Type "adb reboot bootloader" (without quotes) - then your phone will reboot to bootloader - DO NOT CONTINUE TO STEP 12 IF YOU'R SCREEN ISN'T IN BOOTLOADER YET
12.) Type "fastboot flash recovery twrp-3.0.0-0-Z00A.img" (without quotes)
13.) When it says "finished " then disconnect your phone
14.) By pressing volume down - keep on pressing volume down until "Recovery Mode" shows up
15.) Press Power Button - it will reboot and now proceed to TWRP Recovery
16.) At first start you will see a Message "Keep System Read Only" - just check the "Never show this screen during boot agent" then Swipe to continue to TWRP.
17.) Go to Reboot - System - and wait for it to reboot to system.
LASTLY -> Now to ROOT:
1.) Download Root Files: http://www.mediafire.com/file/2lgl20g5a2u6041/Zenfone_quickroot.zip
2.) Extract to a Folder
3.) Connect your phone to your PC
4.) Run "Root_zenfone.bat" - just open DO NOT RUN AS ADMIN
5.) Your phone will reboot to fastboot and then will reboot again to system
(If nothing happens then Retry Running "Root_zenfone.bat" again)
CONGRATULATIONS!
-----------------------------------------------------------------------------------------------------------------------------------------------
4.) CUSTOM ROM INSTALLATION
Requirements:
• TWRP Installed
• Bootloader Unlocked
• Upgraded Bootloader to MM
THESE STEPS ARE SEQUENTIAL, DO NOT SKIP ANY PART IF YOU HAVEN'T DONE THESE BEFORE.
FIRST-> BOOTLOADER UPGRADE TO MM
If you have a LP Bootloader then you must DO THIS
(How do I know my Bootloader? -Power OFF Device, Press Power + Volume UP until The asus Logo Shows up, the bootloader will be shown, if the LAST LINES of the Bootloader is color "BLUE" it means you have a MM Bootloader but if it is "GREEN" then you have LP Bootloader!)
You need to upgrade to MM Bootloader First, so heres the instructions:
1.) First Download: https://drive.google.com/drive/folders/0BxcPlfGvBnwubFNYZjF1QzUteVU
Select your device model either ZE551ML or ZE550ML (PLEASE DOWNLOAD THE CORRECT FILE!)
2.) Go to bootloader by TURNING OFF Phone - when it is completely turned off Press Power + Volume UP until The asus Logo Shows up (Release once the logo shows up)
3.) Extract to a Folder - open the M_BL_upgrade_for_zf2_55 folder then you will see an "Upgrade.bat" - DO NOT OPEN IT YET!
Make sure your device is Connected! To do so - connect your phone to PC then SHIFT+RIGHT CLICK on the background of the folder and click "Open Command Window here" - type in "fastboot devices" - your phone must be displayed there.
4.) Once it is connected - Open the Upgrade.bat - just OPEN it - DO NOT RUN AS ADMIN!
5.) Wait for it to finish - it will reboot a few times it is normal.
6.) When "Press any key to continue..." is shown on the window , the process is finished (YOU WILL NOTICE THAT THE LAST LINE ON THE BOOTLOADER TURNS GREEN)
YOU ARE NOW READY TO INSTALL ROM!
Download Roms Whatever you like:
Here are list of roms:
CLEANSTOCK ROM (MarshMallow): https://forum.xda-developers.com/zenfone2/development/rom-cleanstock-mm-z00aww-4-21-40-144-t3492278
VIPER OS (Nougat): https://forum.xda-developers.com/zenfone2/development/rom-viperos-v3-0-t3656084
RESSURECTION REMIX (Nougat): https://forum.xda-developers.com/zenfone2/development/rom-resurrection-remix-n-5-8-4-t3656763
XOSP XPERIA OPEN SOURCE PROJECT (Nougat): https://forum.xda-developers.com/zenfone2/development/rom-xosp-7-1-t3525399
BORETS ROM (Marshmallow): https://forum.xda-developers.com/zenfone2/development/borets-rom-ze551ml-550ml-t3551225
KALI NETHUNTER (Nougat): https://forum.xda-developers.com/zenfone2/development/kali-nethunter-t3329426
RUSSIAN BEAR REBORN (Marshmallow): https://forum.xda-developers.com/zenfone2/development/rom-rbr-v1-0-t3550544
AOKP ROM (Nougat): https://forum.xda-developers.com/zenfone2/development/aokp-asus-zenfone-2-t3507299
OCTO-OS ROM (Nougat): https://forum.xda-developers.com/zenfone2/development/rom-asus-zenfone-2-t3531934
AICP ANDROID ICE COLD PROJECT: https://forum.xda-developers.com/zenfone2/development/rom-aicp-12-1-n-7-1r7-z00a-8-official-t3498862
AND MANY MORE - JUST VISIT THIS LINK AND BROWSE FOR MORE:
https://forum.xda-developers.com/zenfone2/development
Just Follow the instructions on how to Install but this is the typical way of installation:
• Download the ROM
• Place the rom in the SD CARD
• Reboot to TWRP Recovery
• Tap on Wipe - Advanced Wipe - Check Everything except Internal Storage and MicroSD - and then SWIPE to WIPE
• Go Back to Main Menu
• Install - Browse for the ROM and tap it - And swipe to install
• Reboot
That is the Typical way of installing ROM but please refer to the ROM Pages you have clicked!
CONGRATULATIONS!
For Questions, Suggestions, Concerns and Other stuffs
EMAIL ME AT: [email protected]
Attachments

Last edited: