- Messages
- 470
- Reaction score
- 7
- Points
- 128


I used: Adobe Photoshop Cs6 Extended and VLC media player for snap shot
note: you can use any Photoshop version that have an options for animation/timeline.
check on your photoshop menu window/animation or window/timeline
for video player: you can used any video player with a snap shot feature. But for me i used VLC (snap shot button is Shift+S)
In VLC the output for snap shot image are located in your local C:\User\Usersname\My Picture
Or you may check on your VLC Tools>preferences>Video then click Browse on Directory
Now Proceed to our Tutorial.
You can use any movies, in this tutorial i choose any part of a Suicide Squad(2016) movie.
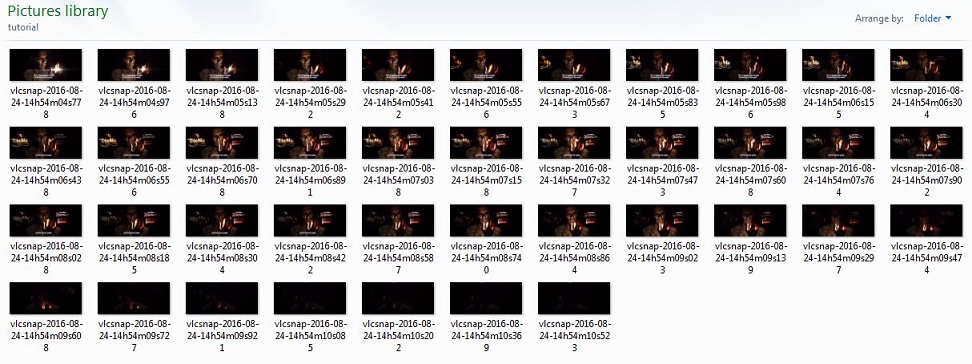
Open your favorite movie in VLC Player, play and go to the part you want and take the snap shot(Shift+S)
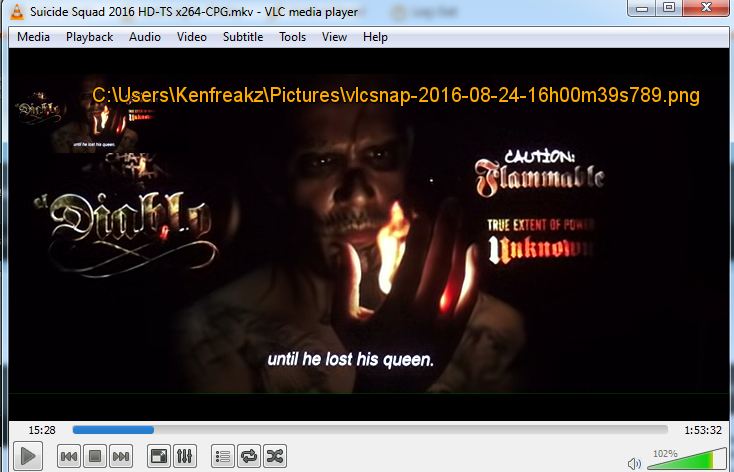
the directory for my snap shot image are in C:\Users\Kenfreakz\Pictures\...
i take 40 times snap shot, remember to choose what video part you need.
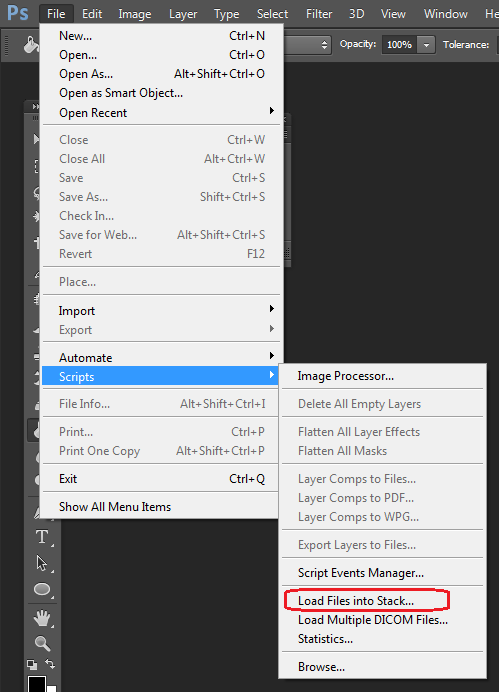
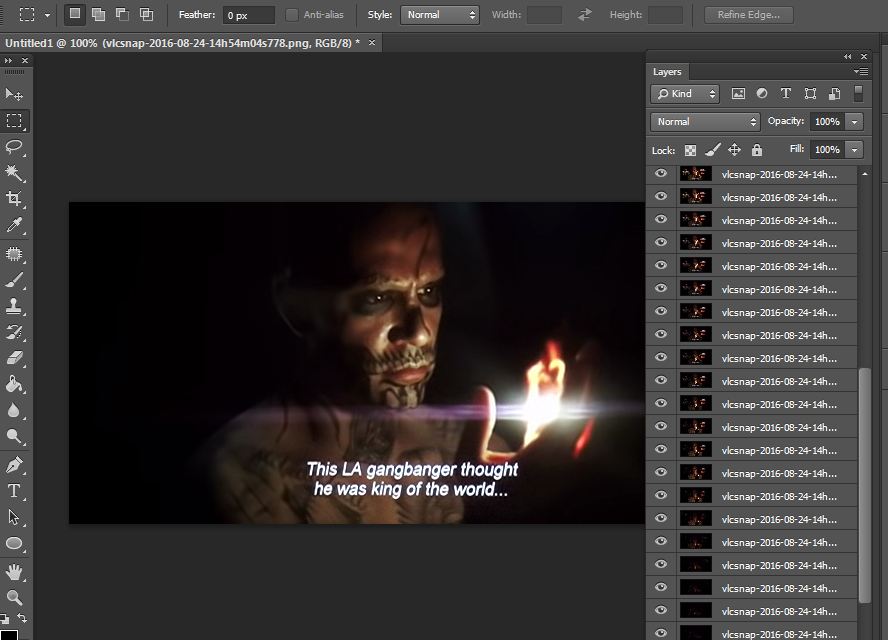
Now Open Your Adobe Photoshop then Click on File > Scripts > Load Files into Stack..
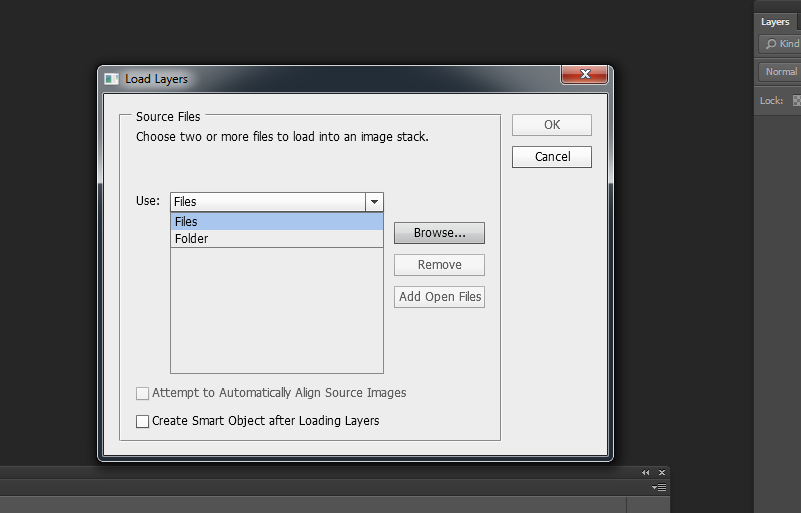
Select Files then Click Browse
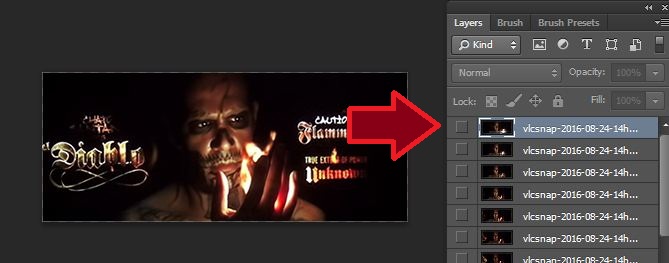
Select all of your snap shot image then click OK
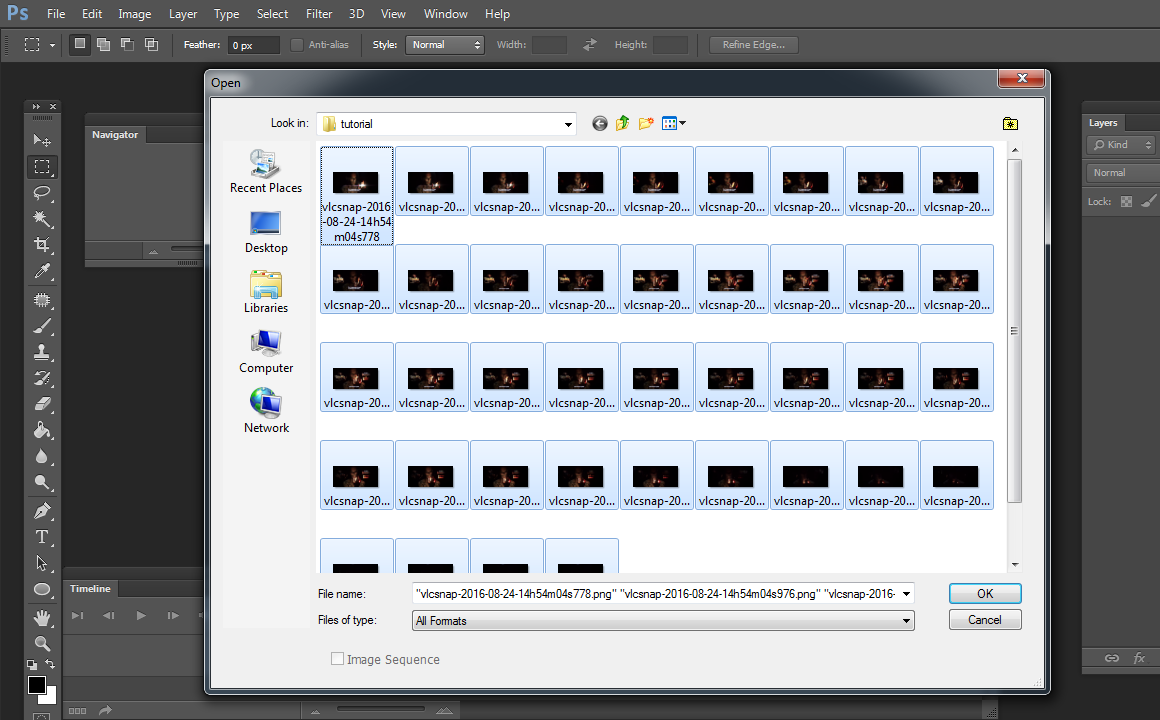
wait for All layers see screenshot
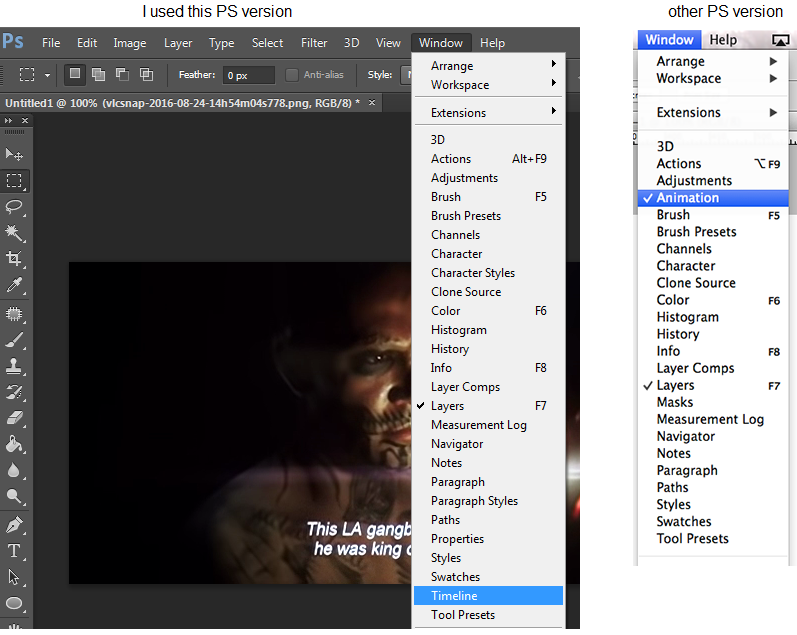
now we're ready for image animation, in PS Cs6 select window > timeline other PS version are window > animation see screenshot
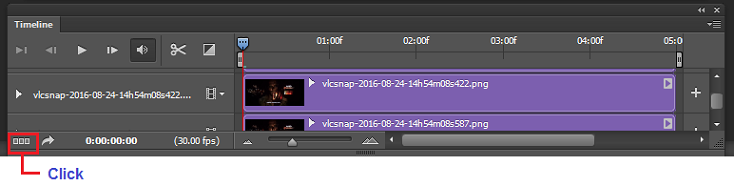
you will see the frame for animation

if incase your ps set to video timeline just click the frame timeline at the button see screenshot
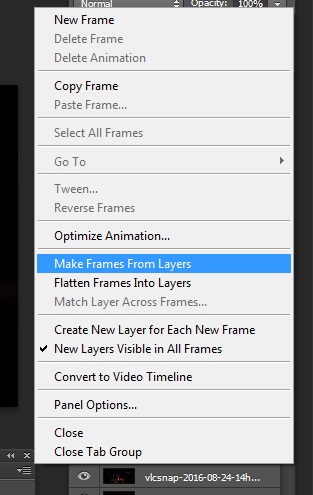
Now we need to insert every snapshot layer into frame timeline

then select Makes Frames From Layers see screenshot
Once all layers are loaded you can play it by clicking the triangle button at the animation timeline below.
if your animation are too fast just select the frame delay time you will see 0.sec change it depend on your desires time. then play again make sure to select all frame before changing the delay time.
then set the looping option to forever for continuos animation. see the buttom of the frame1 & frame2.

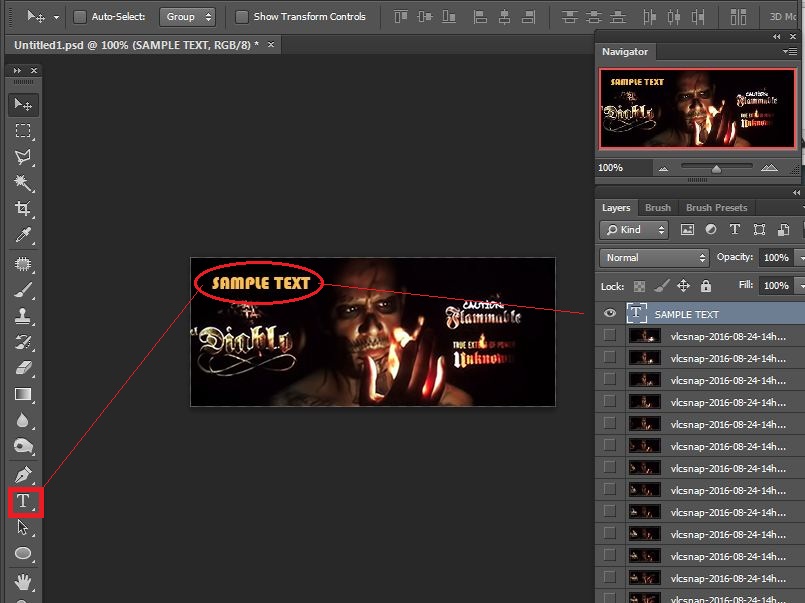
Lets crop the image. Choose the Rectangular marquee tool from the Tool Panel.
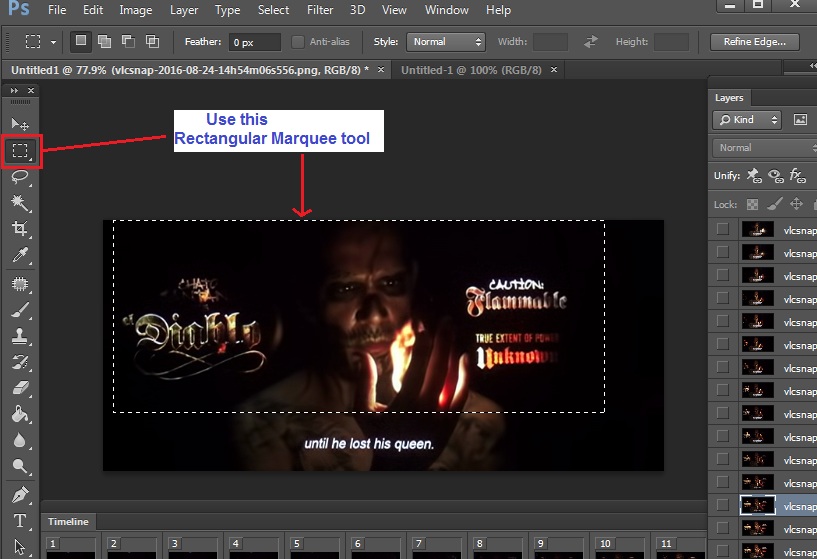
After Selecting a rectangular area on the image, Choose Crop from the Image menu.

Resize all images layer by clicking Image > Image Size or (Ctrl+Alt+I)
Uncheck the scale style & constrain proportion to scale the width and height independently.
The unit of measurement for width and height change into pixels.
In pixel dimension text box i change it into 150 height 400 weight. Forum Signature Size.
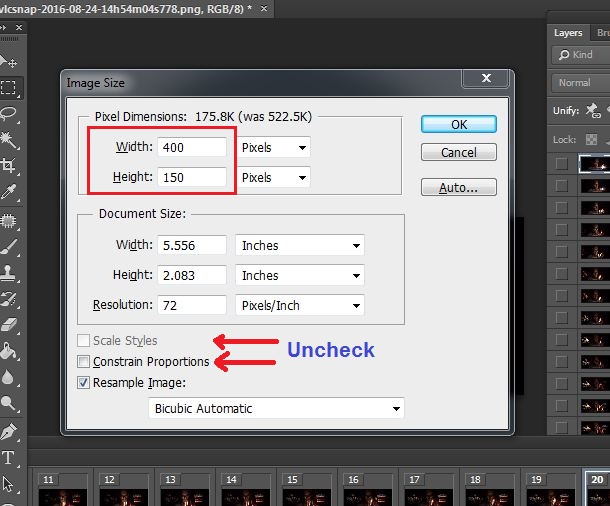
then click OK

Then Save as gif file, in filemenu click File >Save for Web... or (Alt+Shift+Ctrl+S) then OK
 Animation Done

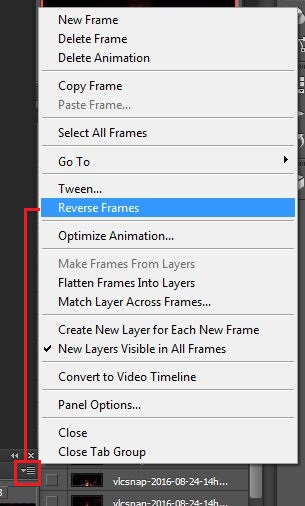
Reverse Animation post#9
=
=
=
=
=
=
OTHER SAMPLE
From Movie: Now You See Me 2

From Movie: Guardians
Note: To use as signature you must reduce the file size in 65kb.
Sample Size for signature(siggy) File size: 150 by 400 pixels 63.3kb

note: you can use any Photoshop version that have an options for animation/timeline.
check on your photoshop menu window/animation or window/timeline
for video player: you can used any video player with a snap shot feature. But for me i used VLC (snap shot button is Shift+S)
In VLC the output for snap shot image are located in your local C:\User\Usersname\My Picture
Or you may check on your VLC Tools>preferences>Video then click Browse on Directory
Now Proceed to our Tutorial.
You can use any movies, in this tutorial i choose any part of a Suicide Squad(2016) movie.
Open your favorite movie in VLC Player, play and go to the part you want and take the snap shot(Shift+S)
the directory for my snap shot image are in C:\Users\Kenfreakz\Pictures\...
i take 40 times snap shot, remember to choose what video part you need.
Now Open Your Adobe Photoshop then Click on File > Scripts > Load Files into Stack..
Select Files then Click Browse
Select all of your snap shot image then click OK
wait for All layers see screenshot
now we're ready for image animation, in PS Cs6 select window > timeline other PS version are window > animation see screenshot
you will see the frame for animation
if incase your ps set to video timeline just click the frame timeline at the button see screenshot
Now we need to insert every snapshot layer into frame timeline
then select Makes Frames From Layers see screenshot
Once all layers are loaded you can play it by clicking the triangle button at the animation timeline below.
if your animation are too fast just select the frame delay time you will see 0.sec change it depend on your desires time. then play again make sure to select all frame before changing the delay time.
then set the looping option to forever for continuos animation. see the buttom of the frame1 & frame2.
Lets crop the image. Choose the Rectangular marquee tool from the Tool Panel.
After Selecting a rectangular area on the image, Choose Crop from the Image menu.
Resize all images layer by clicking Image > Image Size or (Ctrl+Alt+I)
Uncheck the scale style & constrain proportion to scale the width and height independently.
The unit of measurement for width and height change into pixels.
In pixel dimension text box i change it into 150 height 400 weight. Forum Signature Size.
then click OK
Then Save as gif file, in filemenu click File >Save for Web... or (Alt+Shift+Ctrl+S) then OK
Animation Done
Reverse Animation post#9
=
=
=
=
=
=
OTHER SAMPLE
From Movie: Now You See Me 2
From Movie: Guardians
Note: To use as signature you must reduce the file size in 65kb.
Sample Size for signature(siggy) File size: 150 by 400 pixels 63.3kb
Last edited:


 tol
tol