- Messages
- 2,898
- Reaction score
- 1
- Points
- 28
- Thread Starter
- #281
Most of our features and services are available only to members, so we encourage you to login or register a new account. Registration is free, fast and simple. You only need to provide a valid email. Being a member you'll gain access to all member forums and features, post a message to ask question or provide answer, and share or find resources related to mobile phones, tablets, computers, game consoles, and multimedia.
All that and more, so what are you waiting for, click the register button and join us now! Ito ang website na ginawa ng pinoy para sa pinoy!
hahah pag di na po bc
boss ano gamit nyo adobe? parang iba yun interface ng sayo. hindi
hindi ko rin makita yun sinasabi mo na preference dun sa cs5?
parang iba yun gamit mo adobe.
wow ganda nito t.s tnx for sharing


ETO PA DAGDAGAN ULIT NATIN NG ISA PANG TUTORIAL
THIS TIME NEXT LEVEL NA TYO
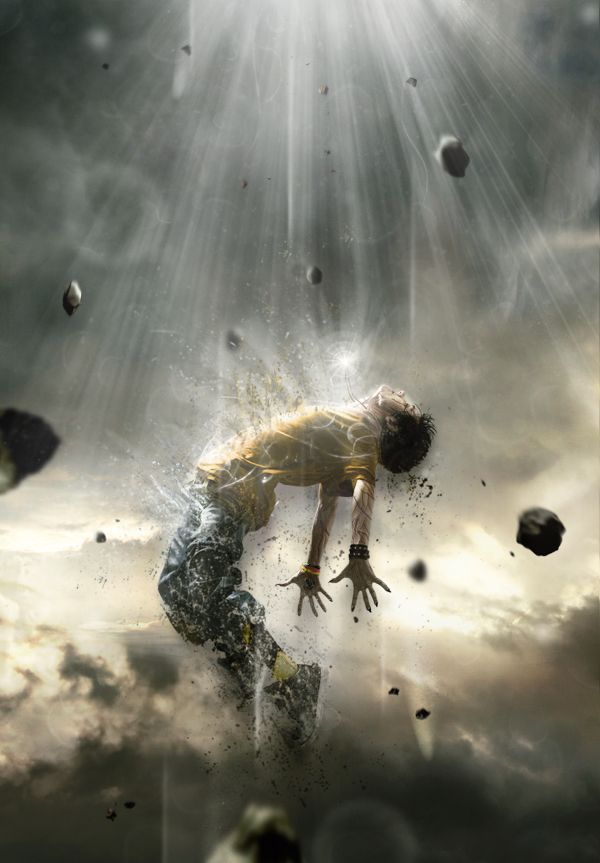
Human Disintegration Effect
In this tutorial we will create a powerful, and emotional human disintegration effect in Photoshop. Let’s get started!
Step 20
To finalize everything, you can return to the colors, contrast and even intensify the bright areas with the same techniques you’ve used before. Basically, this step consists in putting your last personal touch to your piece! When you feel that your piece is finished, use a sharpness filter, to ensure a better overall quality, by duplicating your final image and by going to Filter > Sharpen > Sharpen.
oh finish na tayo hahah i hope you like this simple tutorial
etong tutorial na to ay natutunan ko lang din at iniimprove ko pa hahah...
wala kang effects na plugin na ginamit sa pag edit sir? 

 :CSA:
:CSA:Oh ayan mag update na ulit ako ng new tutorials na pinag aralan ko sana magustuhan nyo.. hahah medyo madali lang tong ituturo ko patience lang ang kelangan haha so lets start ..
Now were done..this is the final image

 grabe
grabe  galing mo talaga sir :applause:
Update Tayo
Final Image
Here is the final image. I hope you liked this tutorial and the techniques you learned will come in handy for your own designs.
like it sarap nman pag matuto ako nito share q lang po...
Looks great! To finish off the tutorial select the Eraser Tool and a soft round brush with size of 100 px and make clear the lower part of the face and neck, but a little bit!

the end...
enjoy mga sir...happy editing
 wow galing nman ioverlay lang pala yan?
 kakatpus ko lang gumawa ng edit photos ayus lang ba edit ko hahah

try nga...salamay

grabeh nman. heheh ,sobrang galing nman


woh
grabe
nice... good help for me..
napaka ok niyan kuya
.alam niyo po buh saan makapagdonwload ng brush splatter na freE? pwedi buh lagyan ng plugin ang portable?

Hindi na yan pang Bigginer...
ako dito. More pa sir.walang anuman sir
di naman po ako magaling sir
Dun sa tanung mo sir di ko na matandaan kung may ginamit akong plugins dyan eh pero sa pagkakaalam ko wala akong ginamit dyan sir
salamat po
pwede po atang lagyan ng plugins ang portable sir .. di ko pa kasi na tatry mag lagay eh.. di ko na kasi tanda sa sobrang bc ko


")